Grid for Drawing
A drawing grid divides your reference picture into equal cells so you copy one small square at a time instead of judging the whole image at once. Create yours online in seconds, or read on to find out which grid fits which drawing, and how to get it onto paper at the right size.
Runs on our homepage: upload a picture, the grid is on it in seconds.
What a Drawing Grid Does
A grid for drawing is a set of evenly spaced lines laid over a reference picture. You draw the same grid lightly on your paper, then reproduce the contents of each cell: a short line here, a curve touching the top-left corner there. The eye is poor at estimating whole-picture proportions but very good at comparing short distances inside a small square. That is the entire trick, and it is why the grid method has survived five centuries of art practice.
It also changes what you look at. Without a grid you see a face and draw the face you expect; with one you see that the corner of the mouth sits a third of the way across cell D5, which is a fact about this face and not about faces in general. Every cell asks the same two questions, where does the line enter and where does it leave, and answering them is the whole job.
The full technique (choosing a reference, setting up both grids, transferring cell by cell, removing the lines afterwards) is covered in our complete grid drawing guide.
Which Grid for Which Drawing
Two numbers decide whether a grid helps or gets in the way: how many cells it has, and how large each cell is on your paper. The rule of thumb is that a cell should be about the size of the smallest thing you must get right. For a portrait that is an eye; for a street scene it is a window; for a bowl of fruit it is one piece of fruit. Smaller than that and you spend the session counting squares. Larger, and you are back to guessing inside each one.
| Subject | Cells | Cell on A4 or Letter | Why |
|---|---|---|---|
| First attempts, simple objects | 4×4 | 5 cm / 2 in | Few cells to keep track of while the workflow is still new. |
| Portrait, head and shoulders | 8×8 to 10×10 | 2 cm / ¾ in | Likeness lives in small distances around the eyes and mouth. |
| Full figure | 6 across, 9 down | 3 cm / 1¼ in | Tall format; the cells stay square and the proportions of the body are what matters. |
| Animals and fur | 6×6 | 3.5 cm / 1⅜ in | Outline and the eye need to be exact; texture does not. |
| Landscape | 5×5 or 6×6 | 4 cm / 1½ in | Forgiving subject; a tree a little to the left is still a tree. |
| Buildings and streets | 8×8 to 12×12 | 2 cm at 8×8, 1.75 cm at 12×12 | Straight lines and perspective show every error; more cells catch the angles. |
| Lettering, logos, patterns | 10×10 and finer | 1.5 cm / ⅝ in | Everything is edge; the viewer knows the shape and spots a deviation at once. |
The paper column assumes the picture fills an A4 or Letter sheet held the same way round as the picture. These are starting points, not rules. If you notice you are counting more than you are drawing, take cells away. If you keep hesitating inside a cell because there is too much in it, add some, or add them only where it matters: many artists work a portrait at 6×6 and then subdivide the two or three cells around the eyes and mouth into quarters. The image grid maker lets you set rows and columns separately, so a tall figure can have 6 columns and 9 rows and every cell still stays square.
Cell Size Beats Cell Count
The count matters less than the size, because the size is what has to agree between the picture and the paper. If you choose 8×8 on a landscape photo and 8×8 on a portrait-shaped sheet, the cells on paper are not square any more, and every circle in your reference becomes an oval on the page. Set the cell size instead, in centimeters or inches, and let the count follow from the picture. A 2 cm cell on the screen and a 2 cm cell on the paper reproduce the picture at its own size. A 2 cm cell on the screen and a 4 cm cell on the paper double it, exactly and everywhere, which is how a postcard becomes an A3 drawing without a photocopier. The grid maker for drawing works from that side: you name the cell in centimeters or inches and pick the sheet, and the column and row counts follow.
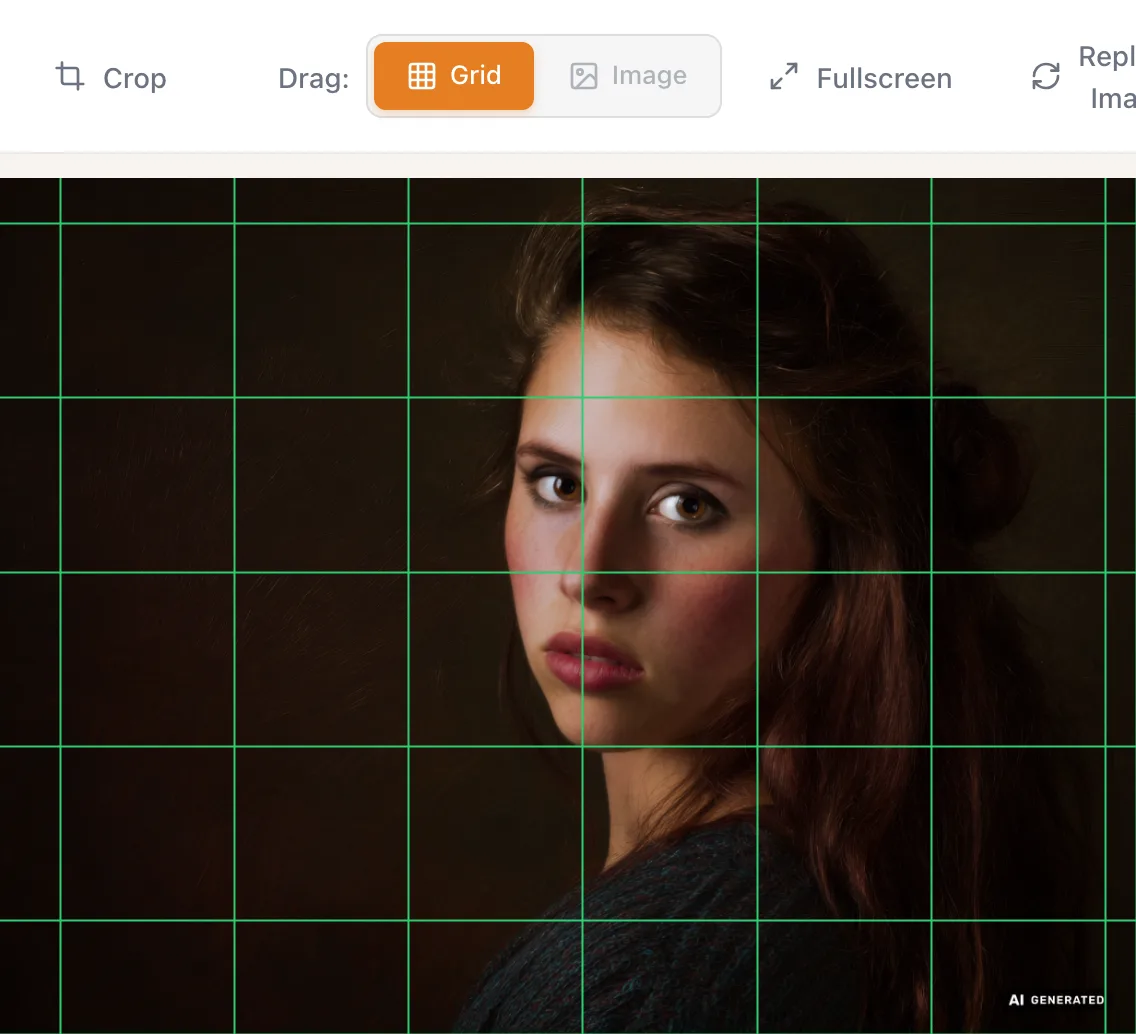
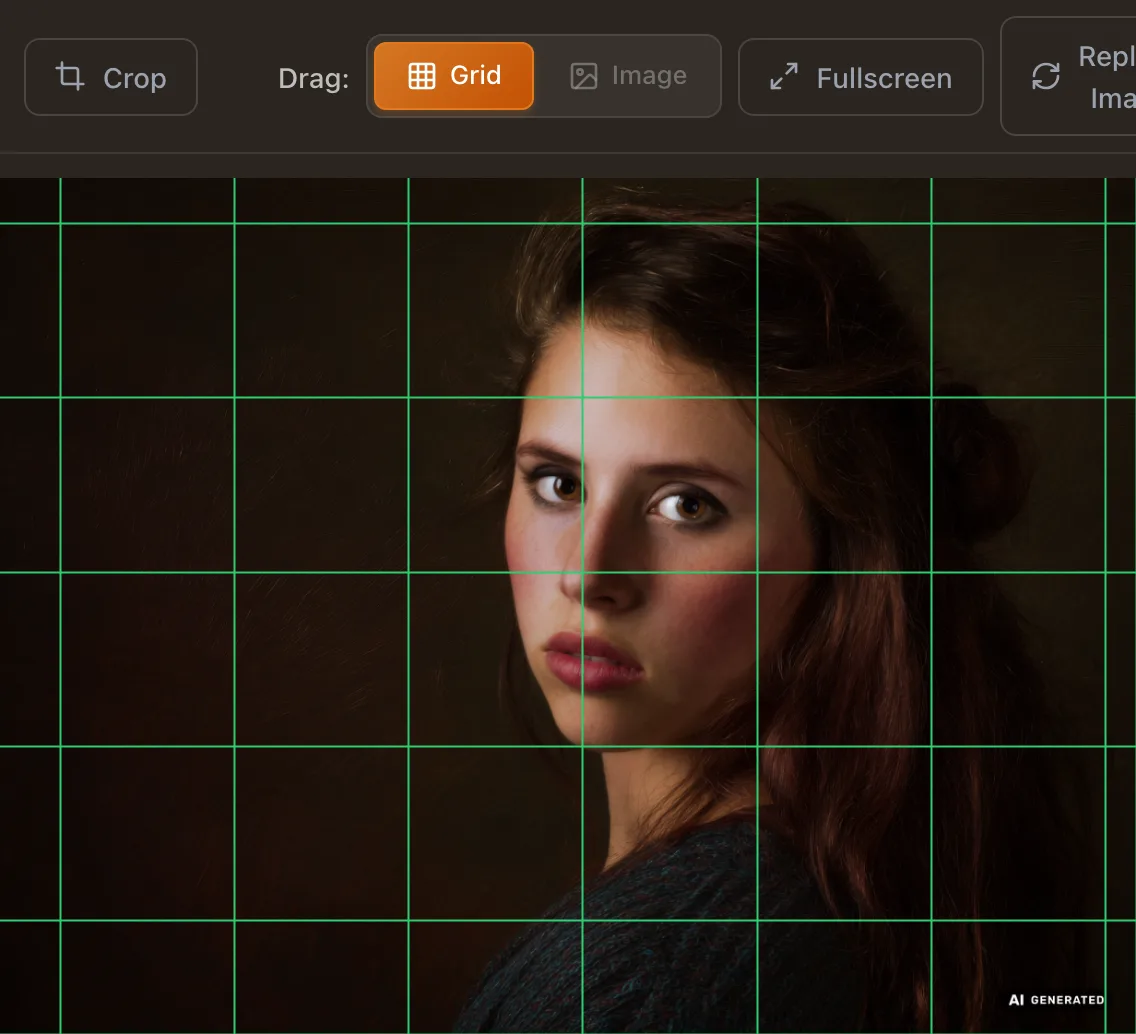
Where a line falls matters as much as how far apart the lines are. A grid line running through the pupils or along the line of the mouth hides the very edge you need to see. Drag the grid a few millimeters until the lines sit between features rather than across them; the cells stay the same size, only their position changes.
Drawing Grid Online vs. Drawn by Hand
You can rule a grid onto a printed photo with a pencil, and artists did it that way for centuries. The problems are practical: measuring errors compound across cells, ink ruins the reference, and every new cell size means redrawing everything.
A drawing grid online sidesteps all three. Cells are mathematically equal, the reference stays untouched underneath, and changing from a 1-inch to a 2-centimeter grid is one input field. You can drag the whole grid so lines fall between the eyes instead of across them, add coordinates (letters across, numbers down) to keep your place between screen and paper, and export the result as PNG or a print-ready PDF. Line style, thickness, color and opacity are set in the grid generator, which is what saves a black grid from disappearing into a dark reference. If you only want the gridded picture and are not drawing from it today, add a grid to a photo is the same tool in three steps.
From Screen to Paper
You no longer have to rule the paper grid by hand: the tool prints a matching empty grid straight onto your drawing paper at true size, with the same cells as on your photo, faint enough to erase. For stretched canvas or sheets that never see a printer, it produces ruler strips and edge marks instead. How that works, step by step, is on the transfer drawing to canvas page.
If you prefer ruling it yourself, use a hard pencil (2H to 4H) and the lightest pressure that still leaves a visible line, so the grid lifts off with a kneaded eraser once your outlines are in place. Measure every line from the same edge of the sheet rather than from the previous line, because an error of half a millimeter repeated eight times is four millimeters by the far side, and a face that is four millimeters wider on one side is a different face. The measuring order that avoids it, and the check that proves the print was not scaled, is in how to transfer a grid to paper at true size.
Working With the Grid
Draw the outline first, in every cell, before you shade anything. Work cell by cell but check each new line against its neighbors: a curve that enters cell C4 must leave cell C3 at the same point, and those two marks are your best check that you have not drifted. Look for where an edge crosses a grid line and mark that crossing with a dot before joining the dots; crossings are the easiest thing in the picture to place exactly. When the neighboring cells keep pulling your eye back to the whole face, blank them: how to focus on one cell at a time is the habit and the setting that does it.
Treat the background as seriously as the subject. Beginners draw the face carefully and then guess the shoulders, and the guessed shoulders are what make the drawing look wrong. The grid does not know which cells are important, and for the first pass neither should you.
Working from a tablet or a second screen changes nothing about the method. Keep the gridded reference open next to the paper, at a size where you can read the coordinates, and dim the room lights a little so the screen and the paper are close in brightness; judging tone across a bright screen and a dim sheet is where most shading errors come from. Once every outline is in, photograph the sheet and compare drawing to reference before you shade, while a drifted jaw still costs one eraser pass instead of a session.
Mistakes That Cost the Likeness
- Too many cells. A 16×16 grid on a portrait turns drawing into data entry, and the drawing comes out stiff because no line was ever longer than a cell. Use fewer cells and subdivide only where you need to.
- Lines through the features. A grid line along the mouth or through the eyes hides the edge you most need to see. Drag the grid until the lines sit between features.
- Cells that are not square on the paper. Choosing a count instead of a size on a differently shaped sheet stretches everything. Set the cell size and let the count follow.
- Pressing hard. Grid lines and construction lines drawn with a soft pencil under pressure dent the paper and never fully erase. Hard pencil, light hand.
- Erasing the grid too early. Keep it until every outline is in and checked; once it is gone there is nothing to check against.
Frequently Asked Questions
- What is a drawing grid?
- A drawing grid is a set of evenly spaced horizontal and vertical lines placed over a reference picture. Together with a matching grid on your paper, it lets you transfer the image one cell at a time, which keeps proportions accurate without measuring instruments.
- How many squares should a grid for drawing have?
- As few as get the job done. Four by four is enough for a first attempt or a simple object; a portrait usually wants eight by eight or a little finer; buildings with many straight edges reward ten or twelve across. The test is whether you are drawing or counting: if you are counting, use fewer cells.
- What size should the cells be on my paper?
- The same size as on the reference if you want the drawing at the size of the picture, or a fixed multiple of it if you want it larger. Choosing the cell size in centimeters or inches, rather than a number of cells, keeps every cell square on both the picture and the paper, whatever shape the sheet is.
- Do I have to draw the grid on my paper as well?
- The method needs both grids, but you no longer have to draw yours: the tool prints a matching empty grid onto your drawing paper at true size, or produces ruler strips for canvas you cannot print on. If you would rather rule it by hand, draw lightly with a hard pencil so it erases cleanly later. The cell size in centimeters or inches stays 1:1 either way.
- Can I use a drawing grid online without printing anything?
- Yes. Keep the gridded reference open on a screen or tablet next to your paper and work from it directly. The coordinate labels (A–Z columns, numbered rows) help you keep your place between screen and paper.
- Can I use a grid for drawing on canvas?
- Yes. A stretched canvas cannot go through a printer, so the tool produces ruler strips and edge marks at the true cell size instead; you tape them along the edges and connect the marks with a straightedge. Use a hard pencil or thinned paint that the first layers will cover.
- Does drawing with a grid stop me from learning to draw freehand?
- The opposite, in practice: comparing angles and distances cell by cell trains exactly the observational skills freehand drawing needs. Most artists use grids less over time because their eye has learned to measure. The grid is a measuring habit you outgrow, not a crutch you keep.