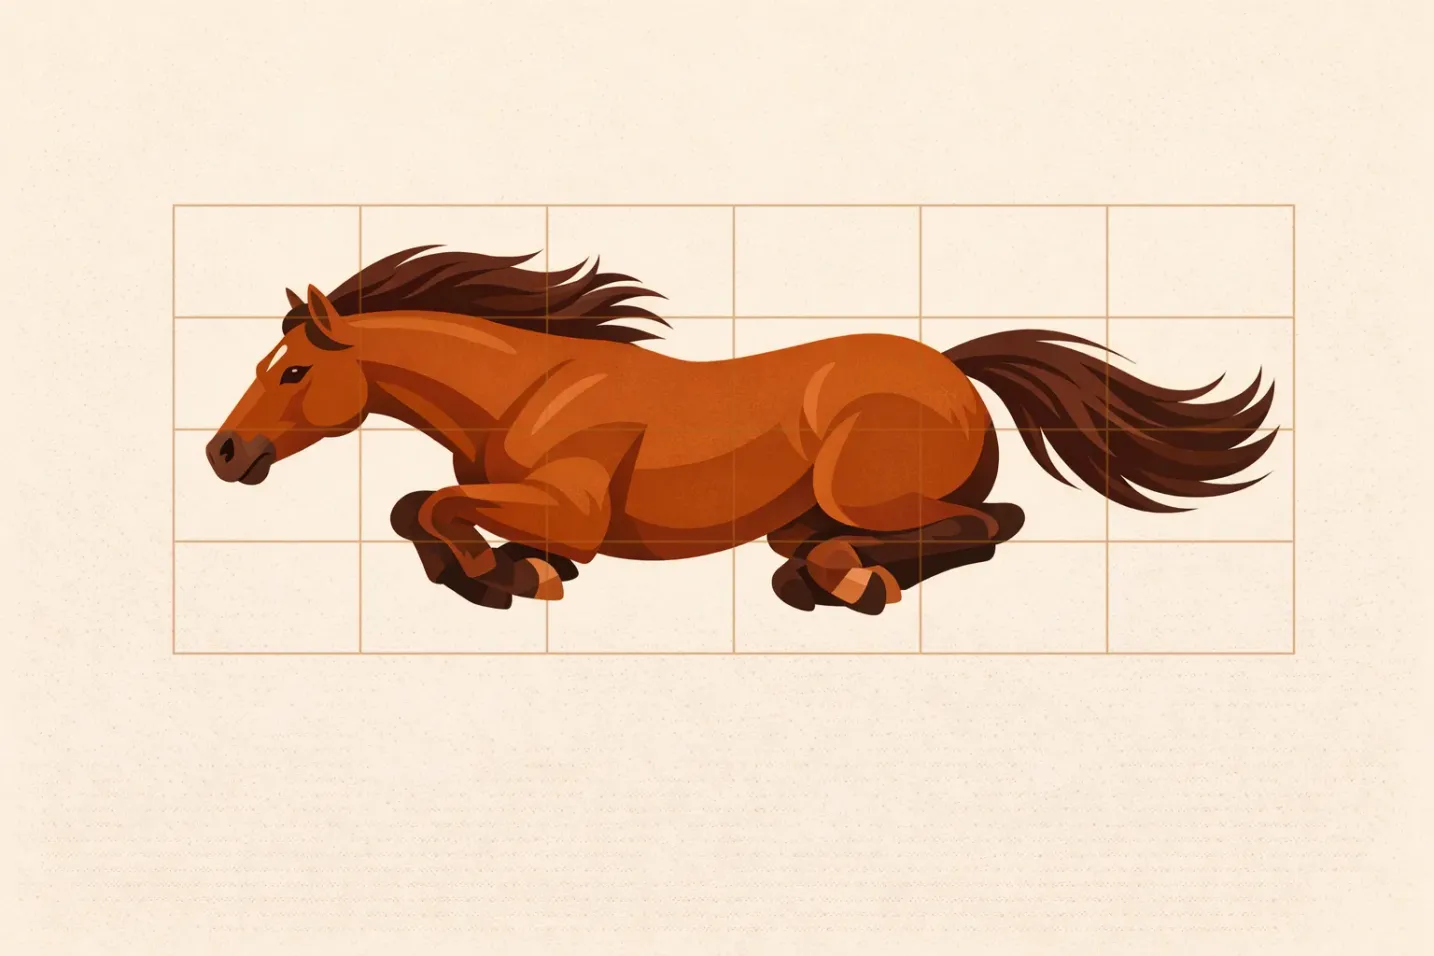

For as long as anyone had painted horses, they painted the gallop the same way: all four legs stretched fore and aft, like a rocking horse mid-leap. In 1878 Eadweard Muybridge photographed one, and the pose turned out not to exist. This guide covers what animals actually do while moving, and how to grid it. For the underlying technique, see our complete grid drawing guide.
What Muybridge Settled in 1878
Muybridge's sequence at Palo Alto used a row of cameras tripped by the horse itself. The plates showed two things at once. First, a galloping horse does leave the ground with all four feet: that part of the tradition was right. Second, it happens while the legs are gathered under the belly, hind feet swinging forward past the front ones, never in the outstretched "flying gallop" pose that painters had used since antiquity.
Three facts follow, and they are the difference between a drawing that reads as a horse and one that reads as a hobby horse:
- One suspension phase per stride. The transverse gallop has a single airborne moment in each cycle, and it is the gathered one.
- The extended flying gallop is a myth. Legs at full stretch fore and aft is the pose the photographs disproved. Draw it and every rider who sees the picture will know.
- Double suspension belongs elsewhere. Cheetahs and greyhounds do have two airborne phases per stride, one gathered and one extended, because their spines flex and extend like a bow. That is exactly why a sprinting cheetah looks so different from a galloping horse: the horse's relatively rigid spine drives power through long limb levers instead.
So when a reference photo shows a horse stretched fore and aft with all four feet clear of the ground, the photo is either a jump, a fence-clearing extension, or a painting. Check before you grid it.
The Four Gaits, and What Each One Asks of the Grid
Every drawing decision downstream depends on identifying the gait correctly.
Walk. A four-beat gait in which the number of feet on the ground alternates between two and three as each hoof lifts and lands in turn. There is no suspension at all. Because nothing is airborne, the reference is sharp and a uniform grid works cleanly.
Trot. Two beats. Diagonal pairs move together (left fore with right hind), with a brief suspension between beats. The body bounces vertically, so the head and croup sit at different heights than at rest.
Canter. Three beats, asymmetrical, with one suspension phase. The horse leads with one foreleg, which means left-lead and right-lead canters are mirror images, not the same pose flipped.
Gallop. Four beats plus the single gathered suspension described above. Maximum stride length, maximum spinal involvement, and the phase where proportions look most deceiving.
Dogs, cats and deer run the same catalogue with different emphasis. What changes between species is spinal flexibility and limb proportion: a deer's long metacarpals produce its high-stepping trot, a bear's plantigrade stance produces its rolling walk, a cat's spine coils and releases enough to nearly double its apparent body length between frames.
Selecting and Preparing Motion References
Wildlife references are often blurry: motion, distance, low light. GridMyPic's Outline Studio helps here: it extracts the essential contours from an imperfect photo with a single strength slider, giving you a clean structural map to grid instead of squinting at pixels. Run your reference through it.
Beyond clarity, a reference is worth gridding when it meets three tests:
- The silhouette reads. Cover the detail with your thumb. If the outline alone still says "running dog," the pose is legible. If it says "brown shape," pick another frame.
- The phase is unambiguous. Mid-transition frames (a hoof halfway between lift and plant) look wrong even when they are photographically true, because the eye has no fixed reference for them. Choose the moments the eye already knows: full ground contact, or gathered suspension.
- You can see the far side. At least one far limb and the far side of the ribcage should be readable, or you will invent them.
Work from a sequence rather than a single frame whenever you can. Step through slow-motion video and pull four or five stills covering one complete cycle. Even if you only draw one of them, having the neighbouring frames tells you where each limb came from and where it is going, which is what stops a limb from being drawn at an angle its joint cannot reach.
Grid Setups That Survive Extreme Poses
The problem with moving animals is that the subject changes shape. A galloping horse's apparent body length changes enough between the gathered and extended phases that a bounding box drawn on one frame will not fit the next, even though every bone stays the same length. A grid is what keeps those bone lengths honest while the outline stretches.
Two densities, not five
Use exactly two grids and place them deliberately.
Pass one: 6x4 over the whole animal. Draw the bounding box around the animal including extended limbs, tail and mane, then divide it six cells across by four down. On a 3000-pixel-wide reference that gives 500-pixel cells: coarse enough that you cannot hide inside them, fine enough to place the ribcage, pelvis, skull and each foot within one cell. This pass fixes the pose.
Pass two: 12x8 over head and shoulder only. Once the masses are placed, draw a second grid at double the resolution over the head, neck and shoulder region alone. This is where an error of half a cell width is visible: eye placement, the angle of the muzzle, the position of the scapula against the ribcage. Everything else (flank, haunch, the middle of a limb) stays on the 6x4 and gets drawn by eye.
Two grid densities are enough for any animal. A third is bookkeeping, not accuracy.
For birds, run the 6x4 across the full wingspan box rather than the body, since the wings carry the pose. Then take the 12x8 over head and the wrist joint of the near wing, where the primaries fan.
Placing the grid for a moving subject
- Align the box with the action, not the horizon. For a deer clearing a fence, rotate the whole grid to sit along the jump trajectory. Cells that run parallel to the movement are far easier to read than cells that cut across it diagonally.
- Include the extremes. The bounding box must contain the fully extended hind foot and the tip of the streaming tail. Boxes drawn around the body alone produce cramped compositions where the limbs run out of paper.
- Anchor on the core. Limbs create the drama, but the drawing stands or falls on ribcage, pelvis and spine. Note the grid coordinate of each of those three before drawing a single leg.
When a rectangular grid is the wrong tool
Three situations justify a modified grid. For a rotating subject such as a cat twisting mid-air, a radial grid centred on the axis of rotation gives reference lines that follow the motion. For an animal moving directly toward or away from you, a perspective grid handles the foreshortening that a flat grid will fight you on. And for a long arcing path, such as a diving bird, curved grid lines that follow the arc keep the flow intact.
Treat the grid as scaffolding: it holds the structure while you build, then it comes down. Nothing in the finished drawing should show where the cells were.
The Anatomy Behind the Pose
Skeleton first
Joints have ranges, and the grid will happily let you draw a position no skeleton can reach. A few constraints worth memorising for common subjects: a horse's "knee" on the foreleg is anatomically a wrist and flexes so the lower leg swings backward, the opposite direction to the hock behind it; a bird's wing folds in a fixed sequence at shoulder, elbow and wrist, so a half-folded wing has only one correct shape; a cat's collarbone is reduced to a small free-floating splinter, so the shoulder blade travels further forward than the skeleton looks like it should allow.
Spine flexibility is the single biggest species difference. Cheetahs and greyhounds use the spine as a spring, which is what buys them the second suspension phase. Horses do not. Draw a galloping horse with a cheetah's arched back and the whole animal reads wrong even if every limb is correctly placed.
Muscle in extension and contraction
Muscles work in opposing pairs, and a moving animal never has all of them engaged at once. On the driving hind leg of a jumping horse, the gluteal mass bunches and bulges past the resting contour while the opposing group on the reaching leg stretches long and flat, tendons visible under taut skin. That reciprocal difference between the two hind legs is most of what makes a jump look powerful.
The grid's job here is to catch the proportion consequences. A reaching cat's torso lengthens dramatically; if you draw the stretched form but keep the resting distance between shoulder and hip, the two halves of the drawing disagree.
Working the Drawing in Four Passes
Pass 1: Gesture, before any coordinates. Draw the action line: one curve carrying the primary energy through the body, usually following the spine but free to exaggerate. Block the major masses as ovals and cylinders. Indicate the arcs the limbs travel through. Two to five minutes, no measuring.
Pass 2: Structure on the 6x4. Now bring in the coarse grid and correct what the gesture got wrong. Place skeletal landmarks by cell: skull, base of neck, scapula, ribcage, pelvis, each joint, each foot. Verify that limbs on opposite sides of the body match in length despite different positions.
Pass 3: Refinement on the 12x8. Switch to the local grid over head and shoulder. Eye, ear and muzzle placement, the scapula's angle, the muscle forms that show the current phase. Fur direction follows the form and lies back against the movement.
Pass 4: Motion cues. Vary line weight: heavier and more deliberate where a foot meets the ground, lighter and broken at extremities travelling fastest. Add environmental interaction: displaced dust at a launch point, grass bending away, a cast shadow that establishes height. Leave the fastest-moving areas less finished than the head. A drawing rendered evenly everywhere reads as frozen.
Two Failure Modes and Their Fixes
Impossible positions. Almost always a symptom of drawing from one frame in isolation. Fix it by working from a sequence, checking the joint against a skeleton reference, and erring conservative when unsure. A slightly understated pose is invisible; an anatomically impossible one is the only thing viewers see.
A stiff, frozen result. The usual cause is coordinates before gesture. Establish the action line and the masses first, use the grid only to verify, and let lines run across cell boundaries without pausing at them. Then check weight: a moving animal is falling forward, so its centre of gravity sits ahead of its supporting feet, not balanced over them. For the gesture side of this in depth, see drawing dynamic figures with gesture and grid techniques.
Practice Drills
Build the skill in this order, and time yourself. The clock is what forces selection.
- Static studies, 30 minutes each. One animal at rest, from three angles, on the 6x4. Learn its resting proportions before distorting them.
- Walk cycles, 15 minutes each. Four frames from one walking sequence. Minimal distortion, so the focus is weight shift and footfall order.
- Gallop and jump gestures, 5 minutes each. Twenty of them from video stills. No grid, no detail: only action line and masses. This is where speed comes from.
- Full studies, 45 minutes each. One gathered-suspension gallop, both grid passes, selective finish. Compare your result against the reference by checking three grid coordinates: withers, hip, and the leading forefoot.
Ten sessions of that beats any amount of reading about it.
Animal Motion Drawing Questions
For the proportion fundamentals behind all of this, see mastering anatomy with the grid method. For foreshortening on animals moving toward the viewer, review understanding perspective with grid drawing.
Ready to Try the Grid Method?
Put these techniques into practice with our free grid generator tool—trusted by 170,000+ artists worldwide.
Create Your Grid Now →