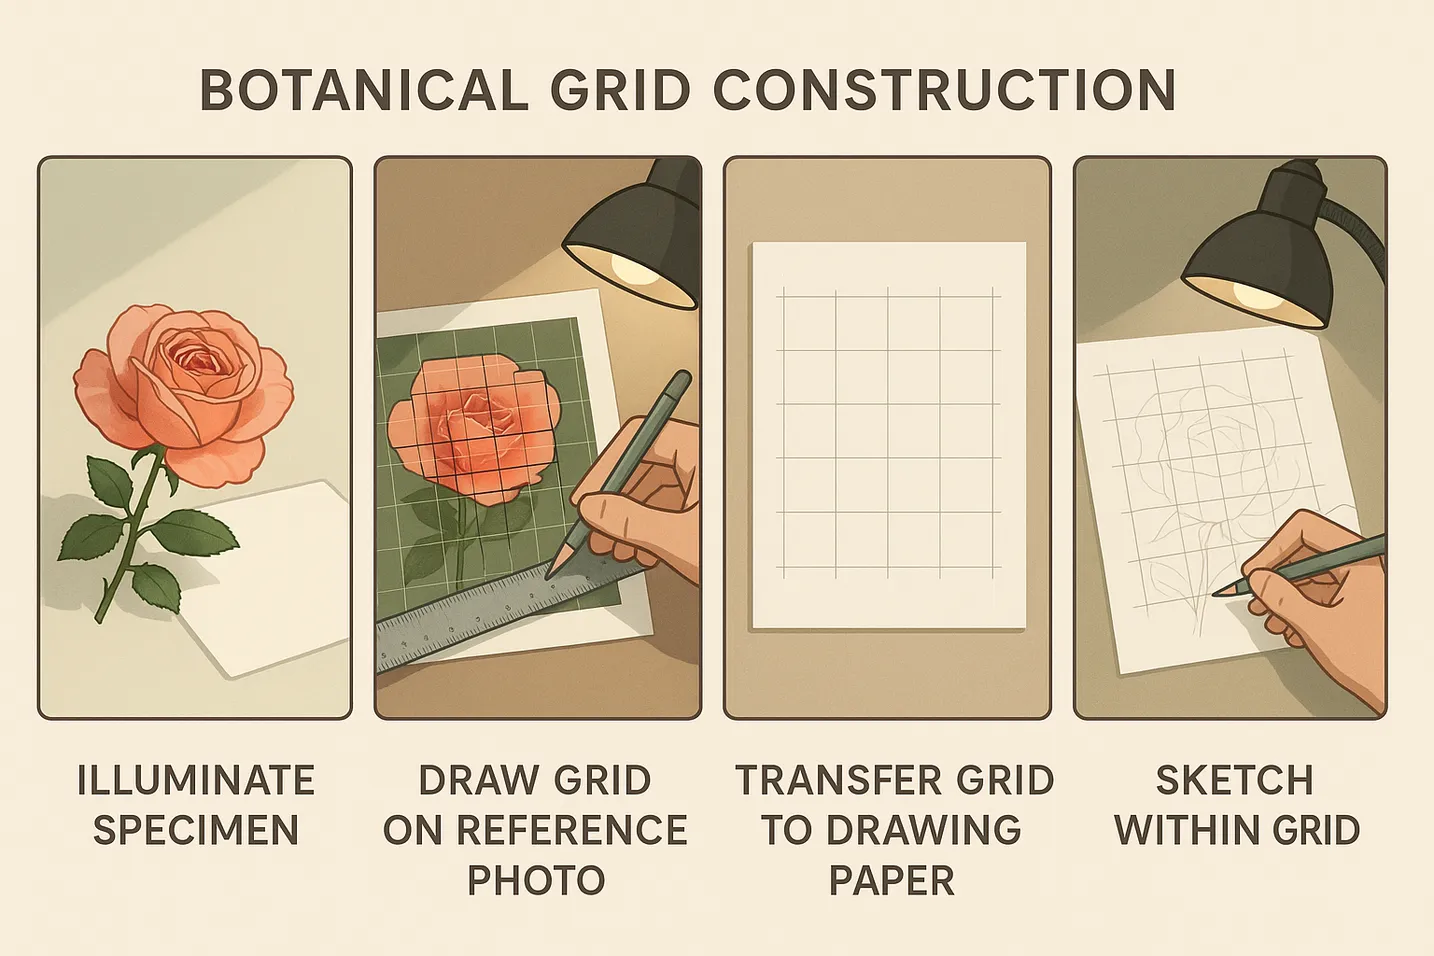
Botanical illustration demands both scientific precision and artistic sensitivity. The grid method provides a systematic approach for capturing the intricate details of plant life, from delicate flower petals to complex leaf structures. For a comprehensive guide to grid drawing techniques, explore our complete grid drawing guide.
The Art and Science of Botanical Illustration
Botanical drawing bridges art and science, requiring accurate representation of plant structures while capturing their natural beauty. This discipline has evolved from medieval herbals through Renaissance naturalism to contemporary scientific illustration. Today's botanical artists continue this tradition, combining observational skills with technical precision that serves both scientific documentation and artistic expression.
The history of botanical illustration reveals how artists have long sought systematic methods for accuracy. From the woodcuts of early herbals to the exquisite watercolors of Pierre-Joseph Redouté, botanical artists have developed techniques to capture nature's complexity. The grid method, while not always visible in finished works, has been a fundamental tool for achieving the precision that botanical science demands.
Modern botanical illustration serves multiple purposes: scientific documentation for taxonomic studies, educational materials for botanical institutions, conservation records for endangered species, and artistic works that celebrate plant diversity. Each application requires absolute accuracy in depicting plant morphology, making the grid method invaluable for maintaining proper proportions and spatial relationships.
The grid method particularly suits botanical work because plants present complex three-dimensional forms that must be translated accurately onto two-dimensional surfaces. Leaves curve and overlap, petals display subtle gradations, and stems twist through space—all requiring careful observation and systematic recording. The mathematical precision of the grid provides a framework within which organic forms can be captured without losing their natural grace. To learn more about grid techniques, explore our complete grid drawing guide.
Understanding Plant Structure for Grid Application
If you want clean proportions before you render delicate botanical details, start from a gridded reference (use our grid drawing tool).
Before applying the grid method to botanical subjects, artists must develop a thorough understanding of plant morphology. This knowledge forms the foundation for accurate representation and helps identify which features require the most careful attention during the drawing process.
Botanical Morphology Basics
Successful botanical drawing requires understanding plant architecture at multiple levels. Each plant represents a complex system of interconnected parts, all following specific growth patterns that vary by species, family, and environmental conditions.
Primary Structures:
- Roots: The hidden foundation of plants, root systems anchor the organism and absorb nutrients. When visible in botanical illustrations, they reveal branching patterns, root hairs, and specialized structures like tubers or aerial roots. The grid method helps capture the often chaotic-seeming but actually systematic root architecture.
- Stems: These support structures transport water and nutrients throughout the plant. Stem characteristics include nodes and internodes, lenticels, bark patterns, and branching angles. The grid ensures accurate representation of stem thickness ratios and branching points, critical for species identification.
- Leaves: Perhaps the most varied plant organs, leaves display incredible diversity in shape, size, margin type, and venation patterns. The grid method excels at capturing the precise outline of complex leaf shapes, from simple ovate forms to deeply lobed or compound structures.
- Flowers: Reproductive structures demand the highest accuracy in botanical illustration. Flower parts must be depicted in correct number, position, and proportion. The grid helps manage the radial or bilateral symmetry common in flowers while maintaining accuracy in irregular forms.
- Fruits and Seeds: These structures often provide key identification features. From simple berries to complex aggregate fruits, each type requires specific attention to surface texture, attachment points, and internal structure when shown in cross-section.
Growth Patterns and Arrangements: Plant growth follows mathematical principles that the grid method naturally complements:
- Phyllotaxy: The arrangement of leaves on stems follows specific patterns—alternate, opposite, whorled, or spiral. The grid helps maintain consistent angles and spacing that characterize each arrangement type.
- Venation Patterns: Leaf veins create networks following predictable patterns—parallel, pinnate, palmate, or dichotomous. Grid squares help track these patterns accurately across the leaf surface.
- Inflorescence Types: Flower clusters arrange themselves in specific patterns—racemes, panicles, umbels, or heads. The grid assists in maintaining proper spatial relationships between individual flowers within the cluster.
- Branching Architecture: Plants exhibit determinate or indeterminate growth, monopodial or sympodial branching. These patterns become clear when mapped onto a grid system.
Observational Priorities
The grid helps organize complex botanical information into manageable sections, allowing systematic observation and recording of essential features:
Diagnostic Features: Every plant species possesses specific characteristics that distinguish it from related species. The grid method ensures these critical features receive proper attention:
- Leaf Margins: The edge of a leaf may be entire, serrate, dentate, lobed, or display various combinations. Grid squares allow precise mapping of margin patterns, essential for identification keys.
- Vein Architecture: Primary, secondary, and tertiary veins create unique patterns. The grid helps maintain accurate angles between vein orders and consistent spacing of lateral veins.
- Floral Formulas: The number and arrangement of sepals, petals, stamens, and carpels follow specific patterns. Grid-based drawing ensures these counts remain accurate and properly positioned.
- Surface Features: Trichomes (plant hairs), glands, scales, and other surface structures require careful observation. The grid provides reference points for distributing these features accurately across surfaces.
Proportional Relationships: Botanical accuracy depends heavily on maintaining correct proportions between plant parts:
- Golden Ratios: Many plants exhibit fibonacci sequences in their growth patterns. The grid helps identify and maintain these natural proportions.
- Scaling Relationships: The size relationship between flowers and leaves, or between different leaf sizes on the same plant, must be preserved. Grid squares provide consistent measurement units.
- Three-Dimensional Form: Plants exist in three dimensions, but botanical illustrations must convey this depth on flat surfaces. The grid assists in maintaining proportional foreshortening and perspective.
Grid Setup for Botanical Subjects
Creating accurate botanical illustrations begins with proper specimen preparation and strategic grid planning. The setup phase determines the success of the final drawing, as corrections become increasingly difficult as the work progresses.
Specimen Preparation
Proper specimen arrangement enhances drawing accuracy and provides optimal viewing conditions for detailed observation. Whether working with fresh or preserved materials, preparation techniques significantly impact the quality of the final illustration.
Fresh Specimens: Working with living plant material offers advantages in color observation and natural positioning but presents time constraints due to wilting. Preparation strategies include:
- Positioning for Clarity: Arrange specimens to display diagnostic features clearly. This might mean gently spreading petals to reveal reproductive structures or positioning leaves to show both upper and lower surfaces. The grid helps plan these arrangements before committing to paper.
- Support Systems: Use modeling clay, wire supports, or water tubes to maintain flower positions. Delicate structures like stamens may need individual support. Document the natural position before manipulation, as the grid will help recreate authentic poses even with supported specimens.
- Hydration Management: Keep cut stems in water, mist delicate petals, and work in cool conditions to extend working time. Some artists photograph specimens at peak freshness, then use the grid to transfer details as the specimen degrades.
- Multiple Specimens: When possible, work with several examples to understand natural variation. Use the grid to composite the most typical features from multiple specimens into a single, representative illustration.
Pressed and Herbarium Specimens: Dried specimens provide unlimited working time but require skill in interpreting flattened forms:
- Three-Dimensional Reconstruction: Pressed flowers lose their natural depth. Study fresh specimens first when possible, using the grid to note proportional relationships that help reconstruct volume in pressed material.
- Color References: Dried specimens rarely retain true colors. Supplement with color notes, photographs, or botanical color charts. The grid helps maintain accuracy in form while color information comes from other sources.
- Detail Documentation: Pressed specimens may lose fine details like hair placement or gland distribution. The grid provides a framework for systematically checking and recording these features from multiple specimens.
- Historical Specimens: When illustrating from type specimens or historical collections, respect the integrity of the material while using the grid to extract maximum information without damage.
Strategic Grid Planning
Botanical subjects require thoughtful grid application that considers both scientific requirements and artistic composition. The planning phase establishes the framework for accurate, beautiful illustrations.
Grid Density Optimization: Selecting appropriate grid density balances detail capture with workflow efficiency:
- Ultra-Fine Grids (20x24 or higher): Reserve for critical details like stamen arrangements, pistil structures, or surface texture patterns. These dense grids work best for small areas requiring maximum precision.
- Fine Grids (16x20): Ideal for complete flower heads, detailed leaf sections, or fruit structures. This density captures intricate petal arrangements while remaining manageable for larger areas.
- Medium Grids (10x12): Standard choice for whole plant illustrations, allowing accurate proportion capture without overwhelming detail. Perfect for educational illustrations and field guide artwork.
- Coarse Grids (6x8): Suitable for habitat sketches, growth form studies, or preliminary composition planning. These grids establish major proportions before adding detail.
- Variable Density Systems: Advanced technique using different grid densities within the same illustration. Apply fine grids to flowers and diagnostic features while using coarser grids for stems and backgrounds.
Compositional Strategies: The grid serves both accuracy and design functions in botanical illustration:
- Central Focus Placement: Position the most important diagnostic features at optical center or following rule of thirds. The grid helps balance scientific requirements with aesthetic appeal.
- Information Hierarchy: Plan space for multiple elements—habit sketch, flower details, fruit, dissections—using the grid to maintain consistent scale relationships between components.
- Label Integration: Reserve grid squares for scientific labels, scale bars, and magnification indicators. Professional botanical illustrations require clear space for nomenclature and notes.
- White Space Management: Use the grid to plan negative space that allows the eye to rest and emphasizes important features. Avoid cramming too many elements into available space.
- Dissection Planning: Allocate grid sections for flower dissections, cross-sections, or detail enlargements. Maintain visual connections between whole structures and their dissected parts.
Drawing Techniques for Botanical Accuracy
The technical execution of botanical drawings requires mastery of specific techniques that have evolved over centuries. The grid method provides the structural foundation, but linework and rendering techniques bring botanical subjects to life with scientific precision and artistic sensitivity.
Line Work Fundamentals
Botanical illustration employs a sophisticated vocabulary of line types, each serving specific descriptive purposes. Understanding and mastering these line variations enables artists to convey complex botanical information clearly and beautifully.
Hierarchical Line Weights: Professional botanical illustration uses systematic line weight variation to create visual hierarchy and convey structural information:
- Primary Contours (0.7-1.0mm): The heaviest lines define major structural boundaries—the overall silhouette of leaves, the main outline of flowers, or primary stem contours. These lines establish the fundamental form and must be drawn with confidence and precision.
- Secondary Structures (0.5-0.7mm): Medium-weight lines describe internal structures—major veins, petal divisions, or stem branches. These lines create the internal architecture within the primary form.
- Tertiary Details (0.3-0.5mm): Fine lines capture smaller features—minor veins, texture indications, or surface details. These lines add richness without overwhelming the primary information.
- Whisper Lines (0.1-0.3mm): The finest lines suggest subtle features—faint veins, delicate hairs, or surface undulations. These nearly invisible marks add sophistication to the drawing.
Line Quality and Character: Different line qualities convey specific botanical textures and surfaces:
- Continuous Smooth Lines: Used for glabrous (smooth) surfaces like waxy leaves or polished stems. The grid helps maintain consistent curves and prevent wobbling in long continuous lines.
- Broken or Dashed Lines: Indicate features hidden from view—roots below soil, structures behind others, or the far side of rounded forms. Consistency in dash length communicates professionalism.
- Stippled Lines: Created by closely spaced dots, these lines describe powdery or granular surfaces like pollen-covered anthers or pruinose (dusty) fruit surfaces. Grid squares help maintain even stipple density.
- Varied Pressure Lines: Lines that transition from thick to thin convey three-dimensional form. Thicker where forms come forward, thinner as they recede. The grid provides reference points for these transitions.
Specialized Botanical Line Techniques:
- Hair Indication: Plant hairs (trichomes) require specific techniques. Simple hairs use single curved lines emanating from the surface. Stellate (star-shaped) hairs need radiating lines from a central point. The grid helps distribute hairs naturally across surfaces. For more on achieving fine details in your drawings, see mastering the grid technique.
- Serration Rendering: Leaf margins with teeth or serrations demand consistent angles and spacing. Each tooth should point toward the leaf apex at the species-characteristic angle. Grid squares ensure regular spacing.
- Vein Networks: The complex networks of leaf veins follow mathematical patterns. Primary veins are thickest, secondary veins branch at consistent angles, and tertiary veins create fine networks. The grid helps maintain these angular relationships.
Building Forms Systematically
The grid method provides a framework for systematic form construction, ensuring accuracy at each stage of development. This methodical approach prevents errors from compounding and maintains scientific accuracy throughout the drawing process.
Phase 1: Structural Mapping: Begin by establishing the fundamental architecture within the grid:
- Map primary axes—main stems, midribs, and petioles
- Establish major proportional divisions
- Block in basic shapes using light construction lines
- Verify proportions against grid measurements
Phase 2: Primary Form Development: With the structure established, develop the main forms:
- Define precise contours using appropriate line weights
- Establish major surface divisions—petal boundaries, leaf lobes
- Add primary venation patterns
- Begin indicating three-dimensional form through line variation
Phase 3: Secondary Detail Addition: Add layers of increasingly fine detail:
- Secondary and tertiary venation
- Surface texture indications
- Minor structures—glands, scales, emergences
- Edge details—serrations, cilia, margin variations
Phase 4: Surface Information: Convey surface character and texture:
- Hair distribution and types
- Stomata patterns (when visible)
- Cuticle texture—glossy, matte, rough
- Color indications through hatching patterns
Phase 5: Final Refinements: Perfect accuracy and add finishing touches:
- Verify all proportions against original grid
- Ensure line weights create proper hierarchy
- Add any missing diagnostic features
- Clean up construction lines
Specific Botanical Drawing Challenges
Each plant structure presents unique challenges that the grid method helps solve. Understanding these specific applications enables artists to tackle any botanical subject with confidence and accuracy.
Flowers and Inflorescences
Flowers represent the most complex and scientifically critical structures in botanical illustration. Their three-dimensional forms, overlapping parts, and precise symmetries demand systematic approaches that the grid method facilitates perfectly.
Radially Symmetrical Flowers: Regular flowers with radial symmetry present specific grid application opportunities:
- Polar Grid Integration: For perfectly symmetrical flowers, overlay a polar grid with radial divisions matching petal numbers. A five-petaled flower benefits from 72-degree divisions, while six-petaled flowers use 60-degree segments.
- Petal Positioning: Each petal must maintain consistent size and spacing. The grid helps identify the exact insertion points and ensures equal distribution around the floral axis. Mark petal midlines first, then build outward symmetrically.
- Overlapping Management: In flowers where petals overlap (imbricate arrangement), establish a consistent pattern—clockwise or counterclockwise. The grid helps maintain this pattern throughout the flower, critical for species identification.
- Depth Indication: Show three-dimensionality through careful observation of petal curves and shadows. Grid squares help track how petals curve away from the viewer, informing line weight variations and shading.
Irregular and Zygomorphic Flowers: Bilaterally symmetrical or irregular flowers require different strategies:
- Orchid Complexity: Orchids epitomize floral complexity with their modified petals, columns, and lips. Use fine grids to capture the intricate relationships between parts. The labellum often requires separate detailed studies within the grid system.
- Papilionaceous Flowers: Pea-family flowers with their standard, wings, and keel demand accurate proportional relationships. The grid ensures proper size relationships between these distinct petal types.
- Asymmetrical Blooms: Some flowers lack any symmetry. Here, the grid becomes even more critical for capturing unique forms accurately. Document the specific irregularities that characterize the species.
- Composite Flowers: Asteraceae family flowers consist of numerous tiny florets. Use the grid to establish the overall head shape, then systematically work through disc and ray floret arrangements.
Inflorescence Architecture: Flower clusters require capturing both individual flower details and overall arrangement patterns:
- Racemose Types: Racemes, corymbs, and umbels follow mathematical spacing patterns. The grid helps maintain consistent internodal distances and pedicel angles.
- Cymose Types: Determinate inflorescences with complex branching patterns benefit from grid mapping to track the blooming sequence and spatial relationships.
- Specialized Structures: Spadices, catkins, and heads require showing both the aggregate form and constituent parts. Use varying grid densities for different detail levels.
Leaves and Foliage
Leaves display enormous morphological diversity, making them both challenging and rewarding subjects for botanical illustration. The grid method excels at capturing their complex forms and intricate details.
Venation Networks: Leaf venation provides crucial taxonomic information and requires precise rendering:
- Primary Vein Architecture: The midrib and main lateral veins establish the leaf's structural framework. Use the grid to maintain consistent angles between the midrib and secondary veins—these angles are often diagnostic for species identification.
- Secondary Vein Patterns: These veins may be opposite, alternate, or irregular. Grid squares help track their spacing and ensure accurate representation of eucamptodromous, brochidodromous, or craspedodromous patterns.
- Tertiary Networks: The finest vein networks create characteristic patterns—reticulate, parallel, or dichotomous. Use fine grids to map these delicate structures, maintaining consistent mesh sizes throughout.
- Vein Relief: Veins may be impressed above and raised below, or vice versa. The grid helps track these three-dimensional aspects through systematic observation of light and shadow.
Margin Complexity: Leaf edges contain vital identification features requiring precise documentation:
- Serration Types: Distinguish between serrate (saw-toothed), dentate (outward-pointing teeth), and crenate (rounded teeth) margins. Grid squares ensure consistent tooth size and spacing.
- Compound Margins: Some leaves display double or triple serrations. The grid helps organize these hierarchical edge patterns systematically.
- Lobe Definition: For lobed leaves, accurately capture sinus depth and lobe shape. The grid provides measurement references for maintaining proper proportions.
- Natural Variations: Include typical damage, insect feeding marks, or growth irregularities that don't obscure diagnostic features. The grid helps position these naturally within the overall form.
Surface Features: Leaf surfaces often display complex textures and structures:
- Pubescence Patterns: Hair distribution may be uniform or concentrated along veins, margins, or in vein axils. Grid squares help map these distributions accurately.
- Glandular Structures: Oil glands, salt glands, or nectaries require precise placement. The grid ensures accurate positioning relative to other leaf features.
- Surface Textures: Bullate (blistered), rugose (wrinkled), or plicate (pleated) surfaces need careful observation. The grid helps track these undulations systematically.
Stems, Bark, and Wood
Stem surfaces provide important taxonomic characters often overlooked in botanical illustration. The grid method helps capture these features systematically.
Bark Patterns and Textures: Mature bark displays species-specific patterns requiring careful documentation:
- Fissure Patterns: Deep furrows in bark follow characteristic patterns—longitudinal, spiral, or diamond-shaped. Use the grid to map major fissure lines, then add secondary cracks systematically.
- Exfoliating Bark: Peeling or flaking bark creates complex layered surfaces. The grid helps track different layers and their relationships, essential for species like birches or eucalyptus.
- Lenticel Distribution: These breathing pores create patterns on smooth bark. Grid squares ensure accurate spacing and size representation of these important features.
- Surface Textures: From smooth to deeply furrowed, bark texture requires appropriate line techniques. The grid provides consistent reference for texture density across the surface.
Young Stem Features: Current-year growth displays different characteristics requiring precise observation:
- Node and Internode Relationships: The spacing between nodes often provides diagnostic information. Grid measurements ensure accurate proportional representation.
- Bud Arrangements: Opposite, alternate, or whorled bud positioning must be depicted accurately. The grid helps maintain proper angular relationships.
- Emergent Structures: Thorns, spines, and prickles have specific origins and positions. The grid ensures accurate placement relative to nodes and internodes.
- Stem Cross-Sections: When showing internal structure, the grid helps maintain accurate proportions of pith, wood, and bark layers.
Scientific Accuracy Requirements
Botanical illustration serves scientific documentation, requiring adherence to established standards that ensure illustrations remain useful for research, identification, and education. The grid method supports these requirements by providing measurable accuracy throughout the drawing process.
Diagnostic Features
Botanical illustrations must prominently display the specific characteristics that distinguish one species from another. These diagnostic features require absolute accuracy, as they form the basis for scientific identification and classification.
Critical Morphological Elements: Scientific botanical illustration prioritizes specific features based on their taxonomic importance:
- Floral Architecture: Accurate representation of flower part numbers is crucial. Whether a flower has four or five petals, six or numerous stamens, superior or inferior ovaries—these details determine family and species identification. The grid ensures accurate counting and positioning of all floral parts.
- Phyllotaxy Precision: Leaf arrangement patterns—alternate, opposite, whorled, or spiral—must be depicted with mathematical accuracy. The grid helps maintain correct angular relationships between successive leaves, critical for species determination.
- Fruit and Seed Structures: Reproductive structures often provide the most reliable identification features. Show dehiscence patterns, carpel numbers, seed arrangements, and dispersal mechanisms. The grid assists in maintaining proper proportions between fruit size and seed size.
- Root System Architecture: When included, root systems reveal important ecological adaptations. Taproot versus fibrous systems, root nodules, mycorrhizal associations, or specialized structures like haustoria require accurate representation.
- Microscopic Features: Some diagnostic features require magnification. Include trichome types, stomatal arrangements, pollen morphology, or cellular patterns when relevant. Use grid subdivisions to maintain accuracy at different scales.
Measurement Documentation: Professional botanical illustrations include precise measurement indicators:
- Scale Bar Implementation: Every botanical illustration requires a scale reference. Position scale bars unobtrusively but clearly, typically in 1cm or 5cm increments. The grid facilitates accurate scale bar creation.
- Actual Size Notations: When illustrations appear at natural size, include "×1" notation. For enlarged or reduced illustrations, specify exact magnification (×0.5, ×2, ×10).
- Relative Proportions: Even without absolute measurements, maintain accurate proportional relationships. The ratio of flower size to leaf size, or internode length to leaf length, provides valuable identification information.
- Comparative Scaling: When showing multiple plant parts, maintain consistent scale relationships or clearly indicate scale changes between elements.
Documentation Standards
Professional botanical illustration follows international conventions that ensure scientific utility and clarity. These standards have evolved through centuries of botanical science and remain remarkably consistent across cultures and institutions.
Essential Documentation Elements:
- Species Identification: Include complete scientific nomenclature—genus, species, author citation. Update naming to reflect current taxonomic understanding. Position labels clearly without obscuring diagnostic features.
- Collection Information: Document collection location with as much precision as privacy allows—country, region, habitat type. Include elevation for mountain species, substrate for epiphytes, or host plant for parasites.
- Temporal Data: Record collection date, flowering or fruiting status, and phenological notes. Seasonal variations may affect certain features, making temporal documentation crucial.
- Voucher References: Link illustrations to herbarium specimens when possible. Include collector name and collection number, allowing future researchers to examine original material.
- Plant Parts Documentation: Clearly indicate which structures are illustrated—habit, flower, fruit, seed, leaf upper surface, leaf lower surface. Use standard abbreviations when space is limited.
Visual Convention Systems:
- Dissection Arrangements: Follow established patterns for displaying flower dissections. Arrange parts from outside to inside—sepals, petals, stamens, pistil. Maintain natural orientation and relationships.
- Section Indicators: Use standard symbols for longitudinal sections (∥) and cross-sections (⊥). The grid helps maintain accurate proportions in sectioned views.
- Magnification Notation: Indicate magnified portions with clear connectors to their source. Use consistent magnification symbols (×5, ×10) positioned near enhanced details.
- Orientation Markers: Include arrows or symbols indicating adaxial/abaxial surfaces, proximal/distal directions, or compass orientations for habitat illustrations.
Advanced Botanical Grid Techniques
Mastery of botanical illustration requires sophisticated applications of the grid method that go beyond basic proportion transfer. These advanced techniques enable artists to create comprehensive scientific documentation while maintaining artistic excellence.
Multi-View Presentations
Complex botanical subjects often require multiple views to communicate complete morphological information. The grid method provides the organizational framework for creating cohesive multi-element compositions that maintain scientific accuracy across all components.
Standard Botanical View Requirements: Professional botanical plates typically include specific views based on the plant group and intended use:
- Habit Illustration: The overall plant form shows growth pattern, branching structure, and natural appearance. Use a medium-density grid (8x10) to capture general proportions while allowing for natural variation. Include enough of the root system to show its type—fibrous, taproot, or specialized structures.
- Flower Face and Profile Views: Frontal views reveal symmetry and petal arrangements, while lateral views show calyx structure, pedicel attachment, and flower depth. Use fine grids for both views, ensuring consistent scale between them. The grid helps maintain accurate proportional relationships between flower parts in different orientations.
- Leaf Surface Documentation: Both adaxial (upper) and abaxial (lower) surfaces often display different characteristics. Upper surfaces may be glabrous while lower surfaces show pubescence. The grid ensures consistent size representation between views while allowing for natural curvature differences.
- Reproductive Structure Details: Fruits require multiple views—whole, sectioned, and sometimes dehisced states. Seeds benefit from showing multiple angles plus any specialized dispersal structures. The grid maintains scale relationships between parent fruit and seeds.
Grid Coordination Strategies: Creating unified multi-view illustrations requires careful planning:
- Master Grid System: Establish a primary grid that encompasses the entire composition. Subdivide this master grid for individual elements, maintaining mathematical relationships between sections. This ensures all elements relate proportionally.
- Scale Consistency: When all views appear at the same scale, use identical grid dimensions for each element. When varying scales for clarity, clearly indicate magnification levels and use proportional grid adjustments.
- Alignment Principles: Align related views along common axes. Place flower profiles adjacent to frontal views with shared horizontal alignment. Position upper and lower leaf surfaces with vertical alignment. The grid facilitates these precise alignments.
- Visual Flow: Arrange elements to guide the viewer's eye through the illustration logically. Start with habit view, progress to flowers, then fruits and seeds. Use grid divisions to create visual pathways between related elements.
Microscopic and Magnified Details
Many diagnostic botanical features require magnification for proper documentation. The grid method adapts elegantly to multi-scale illustrations, maintaining accuracy across vast size differences.
Grid Scaling Techniques:
- Nested Grid Systems: Create primary grids for life-size elements, then establish mathematically related sub-grids for magnified portions. A 10× magnification uses grid squares 10× finer than the primary grid.
- Progressive Magnification: Some features benefit from showing multiple magnification levels. Use exponentially related grid scales (×1, ×5, ×25) to maintain visual relationships between magnification levels.
- Detail Box Integration: Position magnified detail boxes within the overall composition using the master grid for placement. Connect details to their sources with clear indicator lines that don't interfere with scientific information.
- Microscope Reticle Coordination: When working from microscope observations, coordinate the microscope's measurement reticle with your drawing grid. This ensures accurate scale transfer from observation to illustration.
Technical Considerations for Magnified Views:
- Depth of Field Representation: Microscopic views often have limited depth of field. Use line weight variation to indicate which structures lie in the focal plane versus those slightly above or below.
- Three-Dimensional Structure: Even highly magnified subjects have three-dimensional form. The grid helps maintain proper proportions while conveying volume through careful line work and selective detail.
- Cellular Detail Level: Determine appropriate detail levels based on illustration purpose. Scientific publications may require individual cell representation, while educational materials might simplify to tissue patterns.
Working with Different Plant Groups
Each major plant group presents unique challenges and opportunities for botanical illustration. Understanding these differences enables artists to adapt their grid-based techniques appropriately while maintaining scientific accuracy across diverse subjects.
Flowering Plants (Angiosperms)
Angiosperms represent the most diverse plant group, encompassing approximately 300,000 species with remarkable morphological variation. The grid method adapts to capture this diversity while maintaining the precision required for scientific documentation.
Monocotyledon Characteristics: Monocots display distinctive features that influence grid-based drawing approaches:
- Parallel Venation Patterns: Monocot leaves typically show parallel veins running from base to apex. Use the grid to maintain consistent spacing between major veins and track their gentle convergence toward the leaf tip. Secondary connections between parallel veins require fine grid work to capture accurately.
- Trimerous Floral Structure: Flowers parts in multiples of three characterize monocots. When drawing lilies, orchids, or grasses, use grid divisions that accommodate three-fold symmetry. Consider triangular grid overlays for perfectly symmetrical flowers.
- Linear Leaf Forms: Many monocots have elongated, strap-like leaves. The grid helps maintain consistent width along extensive lengths and captures the subtle tapering characteristic of grass-like forms. Pay attention to leaf bases—sheathing, clasping, or petiolate attachments require accurate representation.
- Specialized Growth Patterns: Monocots often display unique growth forms—bulbs, corms, rhizomes, or sympodial branching in orchids. Use the grid to accurately represent these underground or specialized structures when included in botanical plates.
Dicotyledon Complexity: Dicots (now divided into eudicots and basal angiosperms) show greater morphological diversity:
- Reticulate Venation Networks: Net-like vein patterns require careful grid-based planning. Start with primary veins, add secondary branches, then build tertiary networks. The grid helps maintain characteristic angles between vein orders—often 45-60 degrees for secondary veins.
- Variable Floral Merosity: Flower parts in fours, fives, or numerous arrangements demand flexible grid applications. For five-petaled flowers, consider pentagonal grid overlays. For flowers with numerous parts (like Ranunculaceae), use the grid to ensure even distribution.
- Diverse Leaf Architecture: From simple entire leaves to complex compound forms, dicots challenge artists with variety. Use hierarchical grid systems—coarse grids for overall shape, fine grids for individual leaflets in compound leaves.
- Complex Branching Patterns: Dicots display varied architecture—alternate, opposite, or whorled branching. The grid helps maintain consistent branching angles and internode proportions characteristic of each species.
Non-Flowering Plant Groups
Non-flowering plants require specialized approaches that the grid method facilitates through careful adaptation to their unique morphologies.
Pteridophytes (Ferns and Allies): Ferns present elegant subjects with mathematical growth patterns:
- Frond Architecture: Fern fronds display precise mathematical patterns in their pinnate or bipinnate division. Use the grid to maintain consistent angles between pinnae and equal spacing along the rachis. The gradual size reduction toward the frond apex follows predictable patterns the grid helps capture.
- Circinate Vernation: The characteristic coiled fiddleheads of emerging ferns follow logarithmic spirals. Use polar grids or spiral guides within the rectangular grid system to capture these mathematically perfect forms.
- Sori Patterns: Reproductive structures (sori) arrange themselves in species-specific patterns—marginal, linear along veins, or scattered. Grid squares help map these distributions accurately, essential for species identification.
- Rhizome and Root Structure: Underground portions of ferns often display diagnostic features. Show rhizome scales, root patterns, and emerging frond bases using appropriate grid densities for different detail levels.
Bryophytes (Mosses and Liverworts): These small plants require magnification and precise detail work:
- Microscopic Precision: Most bryophyte features require magnification. Use fine grids to capture individual leaf cells, marginal teeth, or costa (midrib) structure. The grid becomes essential for maintaining accuracy at high magnifications.
- Growth Form Documentation: Cushion, mat, or dendroid growth forms characterize different species. Use the grid to capture overall colony shape while maintaining space for magnified individual plant details.
- Reproductive Structures: Sporophytes with their distinctive capsules require accurate proportion representation. The grid helps maintain correct size relationships between the tiny gametophyte and proportionally large sporophyte.
- Habitat Integration: Bryophytes often require showing substrate relationships. Use the grid to include rock surfaces, tree bark texture, or soil interfaces that provide ecological context.
Gymnosperms: Conifers and related plants present unique challenges:
- Needle Arrangements: Fascicled, spiral, or opposite needle arrangements must be depicted accurately. The grid helps maintain consistent angles and spacing critical for species identification.
- Cone Structure: Both ovulate and staminate cones require precise scale representation. Use fine grids to capture scale patterns, bract relationships, and overall cone architecture.
- Bark Patterns: Gymnosperm bark often shows distinctive patterns—plates, furrows, or exfoliating sheets. Grid-based texture mapping ensures accurate representation of these diagnostic features.
Professional Development in Botanical Art
Developing expertise in botanical illustration requires systematic skill building, continuous learning, and immersion in both artistic techniques and botanical science. The grid method provides a consistent framework throughout this developmental journey.
Building Skills Progressively
A structured approach to skill development ensures steady progress while building confidence in increasingly complex subjects:
Level 1: Foundation Skills with Simple Leaves Begin with basic leaf forms to master fundamental techniques:
- Start with entire (smooth-edged) leaves with clear venation patterns
- Practice grid setup and proportion transfer
- Focus on accurate outline capture before adding internal details
- Master basic line weights and quality
- Document common leaves from your area—oak, maple, or simple garden plants
Level 2: Single Flower Studies Progress to three-dimensional forms with regular flowers:
- Choose radially symmetrical flowers with 5-6 petals
- Practice showing both face and profile views
- Learn to convey petal overlap and depth
- Add simple reproductive structure details
- Master the relationship between grid density and detail level
Level 3: Complex Floral Structures Tackle irregular and compound flowers:
- Study orchids, legumes, or composite flowers
- Practice dissection drawing techniques
- Learn to maintain accuracy in asymmetrical forms
- Develop skills in showing multiple flower angles
- Understand how to display diagnostic features clearly
Level 4: Whole Plant Integration Combine multiple elements into cohesive illustrations:
- Plan comprehensive botanical plates
- Maintain scale relationships between parts
- Balance scientific requirements with artistic composition
- Include all necessary views and details
- Practice efficient workflow management
Level 5: Publication-Quality Scientific Plates Create professional-standard illustrations:
- Meet specific publication requirements
- Include all required documentation
- Master advanced techniques for difficult subjects
- Develop personal style within scientific constraints
- Build portfolio of exhibition-quality work
Essential Study Resources
Professional development requires access to quality reference materials and learning opportunities:
Living Collections:
- Botanical Gardens: These living museums provide year-round access to diverse plant collections. Many offer artist programs with greenhouse access and specimen loans. Study exotic species and observe seasonal changes in familiar plants.
- Arboreta: Specialized tree and shrub collections offer opportunities to study bark patterns, branching architecture, and seasonal variations. Document the same species through different seasons.
- Conservatories: Tropical and specialty plant collections provide access to species impossible to grow locally. Study adaptation strategies and unique morphologies.
Preserved Collections:
- Herbarium Access: University and museum herbaria house millions of preserved specimens. Learn to interpret pressed plants and reconstruct three-dimensional forms. Many herbaria welcome serious botanical artists.
- Personal Reference Collection: Build your own herbarium of commonly illustrated species. Press flowers at various stages, preserve fruits, and maintain photographic records.
Educational Resources:
- Field Guides and Floras: Regional botanical references provide species descriptions and identification keys. Understanding botanical terminology improves illustration accuracy.
- Scientific Literature: Access botanical journals for the latest taxonomic updates and detailed species descriptions. Publications often need skilled illustrators.
- Online Databases: Digital herbaria, botanical photograph collections, and scientific databases provide reference material. Many museums digitize their collections for public access.
- Professional Organizations: Join botanical art societies for workshops, exhibitions, and networking. Organizations like the American Society of Botanical Artists provide educational opportunities.
Skill Development Opportunities:
- Workshops and Masterclasses: Learn from established botanical artists through intensive training programs
- Online Courses: Access instruction from international experts
- Grid Tools: Use GridMyPic's free grid generator to create instant grids for your botanical reference photos
- Botanical Art Exhibitions: Study original works to understand technique and presentation
- Scientific Collaboration: Partner with botanists on research projects
Common Challenges and Solutions
Botanical illustration presents unique challenges that the grid method helps overcome. Understanding these common issues and their solutions accelerates skill development and improves final results.
Maintaining Life in Scientific Drawings Scientific accuracy sometimes feels at odds with artistic vitality. The solution lies in observing plants as living organisms, not merely subjects to document. While the grid ensures proportional accuracy, vary line weights to suggest movement and growth. Use confident strokes for major contours while keeping detail work crisp but not mechanical.
Working with Wilting Specimens Fresh botanical material changes rapidly, especially delicate flowers. Photograph specimens immediately upon setup, using the grid overlay for reference photos. Work on the most perishable parts first—flower details, then leaves, finally stems. Keep backup specimens when possible, and understand that some interpretation from wilted material is acceptable if based on careful initial observation.
Balancing Detail Levels Botanical illustration requires selective detail inclusion. Not every hair or vein needs documentation if it obscures more important features. Use the grid to ensure major structures receive proper emphasis while subsidiary details support without overwhelming. Scientific clarity trumps exhaustive detail.
Common Questions About Grid-Based Botanical Drawing
For complementary studies explore grid shading techniques, grid botanical drawing, grid still life guide.
Blend these lessons with grid shading techniques and grid watercolor workflow for a holistic rendering workflow.
Ready to Try the Grid Method?
Put these techniques into practice with our free grid generator tool—trusted by 170,000+ artists worldwide.
Create Your Grid Now →