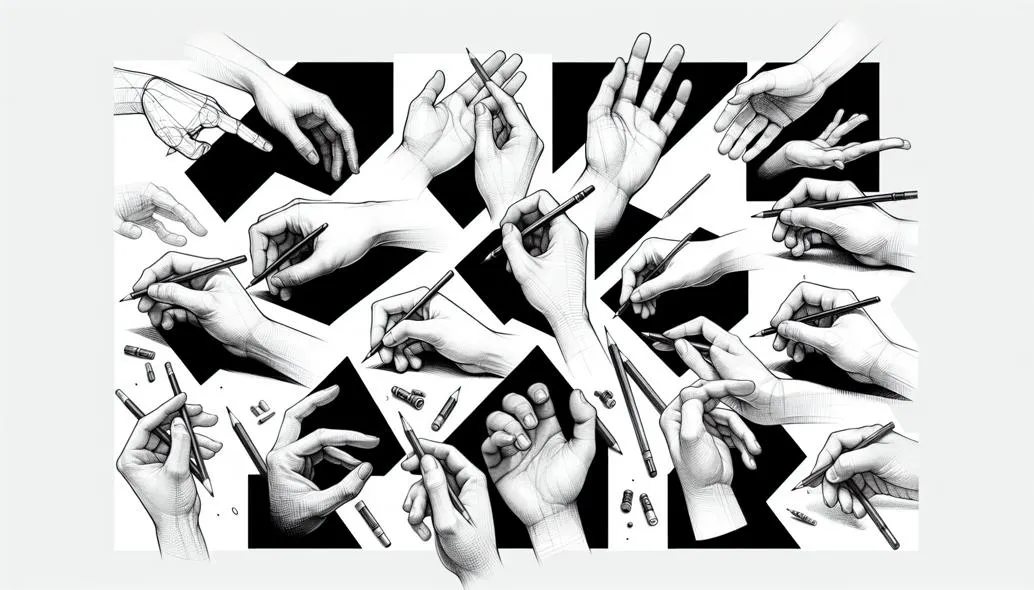
Drawing hands represents one of the most formidable challenges in artistic education. The complexity of their structure, combined with infinite possible poses and subtle mechanical relationships, demands both anatomical knowledge and practiced observation. This systematic approach transforms the seemingly impossible task into a series of achievable steps. For foundational grid techniques that help with complex subjects like hands, see our complete grid drawing guide.
The human hand contains 27 bones, over 30 muscles, and countless tendons working in concert to create the most versatile tool in nature. For artists, this complexity presents both challenge and opportunity. Successfully rendered hands add life, expression, and believability to artwork, while poorly drawn hands can undermine otherwise skilled pieces.
Understanding hand construction requires approaching the subject systematically, building from basic forms to complex details. This methodical process, combined with anatomical knowledge and observational skills, enables artists to tackle any hand pose with confidence. The grid method can be particularly helpful for maintaining accurate proportions in challenging hand poses - learn more in our introduction to grid drawing.
Quick Beginner Method (5 Steps)
If hands overwhelm you, start here — this works even before you “know anatomy”:
- Gesture first: draw one flowing line through the hand’s action (the “pose”).
- Block the palm: a tilted box/wedge, not a flat rectangle.
- Place the knuckle arc: knuckles form a curve, not a straight line.
- Build fingers as 3 segments: big-to-small, tapering to the tip (thumb has 2 main segments).
- Check proportions: compare finger lengths and angles before details.
If you want extra accuracy on tricky poses, adding a grid to your reference (or using a gridded reference) can help you place knuckles and fingertip positions reliably. Try it with our grid drawing tool.
Anatomical Foundation
Skeletal Structure
The hand's bone structure provides the framework for all surface forms:
Bone groups:
- Carpals: 8 wrist bones creating flexible connection
- Metacarpals: 5 palm bones establishing hand width
- Phalanges: 14 finger bones (3 per finger, 2 for thumb)
- Proportional relationships maintain consistency
Key structural points:
- Knuckles align in gentle arc, not straight line
- Middle finger typically longest
- Thumb attaches below other fingers
- Wrist bones create complex joint allowing rotation
Movement mechanics:
- Fingers bend only toward palm
- Each joint has specific range of motion
- Thumb operates on different plane
- Tendons create visible surface changes
Muscle and Surface Forms
Understanding underlying muscles helps create believable surface rendering:
Major muscle groups:
- Thenar eminence: Thumb pad muscles
- Hypothenar eminence: Little finger pad
- Interosseous muscles: Between metacarpals
- Flexor tendons: Create palm lines
Surface landmarks:
- Knuckle prominence varies with position
- Tendons visible on back of hand
- Veins create surface variation
- Fat pads soften bony structures
Basic Construction Method
Phase 1: Simplified Forms
Begin with geometric simplification:
Palm as modified rectangle:
- Draw rectangular form for palm
- Angle sides to show perspective
- Establish thickness with parallel planes
- Mark finger attachment points
- Indicate wrist connection
Fingers as cylinders:
- Simplify each finger to three cylinders
- Connect cylinders at joint locations
- Taper toward fingertips
- Maintain proportional lengths
- Show overlapping for depth
Thumb construction:
- Attach at palm's side, not front
- Two cylinder segments only
- Greater range of movement
- Unique angular relationship
- Wedge shape for thumb pad
Phase 2: Gesture and Flow
Capturing hand gesture creates life and movement:
Establishing action lines:
- Draw curved line through palm
- Add directional lines for each finger
- Show spreading or grouping
- Indicate overall hand gesture
- Maintain natural finger relationships
Dynamic principles:
- Fingers rarely align perfectly
- Natural curves dominate
- Relaxed positions show grace
- Tension creates angular forms
- Gesture precedes detail
For beginners struggling with proportions, explore how grids help beginners draw more accurately.
Phase 3: Refining Forms
Transform basic shapes into believable hands:
Adding anatomical details:
- Round cylindrical fingers appropriately
- Show knuckle bulges
- Indicate finger pads
- Add webbing between fingers
- Define palm creases
Surface characteristics:
- Wrinkles at joints
- Fingernail placement
- Skin texture variations
- Age-appropriate details
- Individual characteristics
Advanced Construction Techniques
Foreshortening
Hands often appear in challenging perspectives:
Approaching viewer:
- Exaggerate size differences
- Overlap forms clearly
- Compress visible lengths
- Emphasize nearest elements
- Maintain form logic
Receding forms:
- Diminish distant elements
- Show clear overlapping
- Compress spacing
- Soften distant details
- Use atmospheric perspective
Complex Poses
Gripping objects:
- Draw object first
- Wrap fingers around form
- Show pressure points
- Indicate tension
- Adjust for object size
Interlocked fingers:
- Map both hands separately
- Show clear overlapping
- Maintain individual hand logic
- Create depth through values
- Simplify where needed
Expressive gestures:
- Pointing: Extension with tension
- Fist: Compression and overlapping
- Spread fingers: Dynamic angles
- Relaxed: Natural curves
- Grasping: Form follows function
Rendering Techniques
Value and Form
Creating dimensional hands through shading:
Light logic:
- Establish consistent light source
- Top planes receive most light
- Knuckles catch highlights
- Spaces between fingers darken
- Cast shadows anchor hand
Form development:
- Block in major value shapes
- Refine plane changes
- Add reflected light
- Develop surface details
- Integrate with overall lighting
Surface Quality
Young hands:
- Smooth transitions
- Minimal surface detail
- Soft forms
- Even coloring
- Plump proportions
Aged hands:
- Pronounced veins
- Visible tendons
- Wrinkled skin
- Age spots
- Bony prominence
Working hands:
- Calluses and scars
- Stronger definition
- Weathered texture
- Thicker proportions
- Character details
Common Challenges and Solutions
Proportion Errors
Problem identification:
- Fingers too short/long
- Palm size incorrect
- Thumb placement wrong
- Width inconsistencies
- Unrealistic poses
Correction strategies:
- Use measurement systems
- Check against references
- Compare to your own hand
- Maintain construction lines
- Regular proportion checks
Stiffness and Lack of Life
Creating natural hands:
- Vary finger positions
- Use curved lines
- Show weight and gravity
- Include subtle asymmetry
- Observe real hand behavior
Detail Management
Balancing detail levels:
- Focus detail at focal points
- Simplify supporting areas
- Suggest rather than render
- Maintain overall unity
- Avoid overworking
Practice Strategies
Structured Exercises
Daily practice routine:
- Gesture drawings (2 minutes each)
- Construction studies (10 minutes)
- Single finger focus (5 minutes)
- Full hand rendering (30 minutes)
- Memory drawing (10 minutes)
Progressive challenges:
- Basic positions first
- Add props and objects
- Include foreshortening
- Draw different ages
- Explore expressions
Reference and Study
Building visual library:
- Photograph own hands
- Collect diverse references
- Study master drawings
- Analyze different styles
- Create reference sheets
Live observation:
- Draw from life regularly
- Note movement patterns
- Study gesture habits
- Observe age differences
- Document discoveries
Mastering Hand Drawing
The journey to mastering hand drawing requires patience, systematic study, and consistent practice. Each hand drawn builds upon previous knowledge, gradually developing the visual vocabulary necessary for confident execution.
Success comes not from avoiding this challenging subject but from embracing its complexity. Through understanding anatomy, practicing construction methods, and developing observational skills, artists transform hands from dreaded obstacles into expressive tools that enhance their artistic vision.
The investment in learning proper hand drawing techniques pays dividends throughout artistic development. Hands communicate emotion, reveal character, and create connection between artwork and viewer. Master this fundamental skill, and watch as figures come alive with newfound expressiveness and authenticity. To continue developing your drawing skills, see mastering the grid technique for advanced applications.
Mastering Hand Drawing Techniques
For further study, explore grid anatomy tips and grid portrait guide.
Ready to Try the Grid Method?
Put these techniques into practice with our free grid generator tool—trusted by 170,000+ artists worldwide.
Create Your Grid Now →