Advanced Shading Techniques for Graphite Portraits
Unlock the secrets of graphite portraits with advanced shading techniques that bring depth, realism, and texture to life. Master the delicate dance of light and shadow today!
Mastering Advanced Shading Techniques for Graphite Portraits
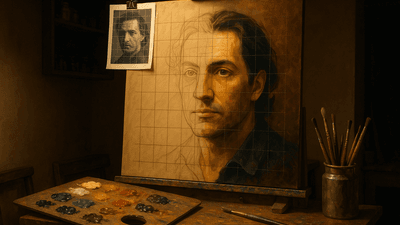
In the world of art, capturing the essence of a subject through graphite portraits is considered one of the most intimate and rewarding endeavors. While the simplicity of pencil and paper may seem unassuming, graphite possesses a level of depth and versatility that transforms simple sketches into intricate, lifelike artworks. In this blog post, we will delve deep into advanced shading techniques for graphite portraits, offering expert guidance to elevate your realistic drawing skills, enhance portrait detail, and provide essential pencil art tips that will push your artistry to new heights.
Graphite's ability to create smooth transitions, intense contrasts, and detailed textures makes it an ideal medium for portrait artists. Mastering its nuances requires a blend of patience, skill, and knowledge of advanced shading techniques. Whether you are an emerging artist aiming to improve your skills or a seasoned creator seeking to refine your craft, this comprehensive guide is designed to provide insight and inspiration.
Understanding the Fundamentals of Shading
Before we delve into advanced techniques, it's crucial to understand the fundamental principles of shading. Shading is the art of representing light and shadow on your subject, creating the illusion of depth and volume. It involves understanding various aspects, such as light source, value range, and the texture of the subject.
Graphite's tonal range allows artists to create a spectrum of shades from the deepest black to the most delicate gray. This quality makes it perfect for capturing the subtle gradations necessary in realistic drawing. Learning to distinguish between highlights, midtones, and shadows and how they interact on a subject's face is the first step toward achieving breathtaking realism.
Essential Graphite Tools and Materials
Choosing the right materials can significantly influence the outcome of your graphite portraits. High-quality pencils, varying from hard grades (H) to soft grades (B), allow artists to express different textures and value ranges. A complete graphite arsenal typically includes pencils with different grades, ranging from 4H, for fine lines and light areas, to 9B, for deep shadows and rich, dark tones.
Additional tools, such as blending stumps, kneaded erasers, and various types of drawing paper, also contribute to the intricacy and realism of graphite portraits. These materials afford artists the control needed to execute detailed shading and texture.
Precision in Layering: Building Depth
One of the advanced shading techniques involves building depth and dimension through precise layering. Start with light pencil strokes to sketch the basic shapes and placement of facial features. This initial outline acts as a guide for further detailing. As you progress, use increasingly softer pencils to gradually build up the layers of shading, paying close attention to the transition between light and shadow.
Soft circular motions, cross-hatching, and fine hatching are excellent methods for building layers. Vary the pressure of your strokes to achieve different values, and use blending tools like stumps or tissues to soften edges and transition between tones. Patience is key in this process; adding layers slowly allows for increased control over the values and more lifelike portrayals.
Techniques for Capturing Skin Texture
Achieving realistic skin texture is a hallmark of expertly rendered graphite portraits. Every face is unique, with varying skin types, textures, and features, making attention to detail critical. To capture skin texture, focus on subtle variations rather than uniform shading.
One method is stippling - creating clusters of small dots to mimic the pores and subtle textures found in human skin. Another advanced technique is scumbling, using small, layered circles to produce a rough, organic look. Combined with smudging, these methods help replicate the complex surface of skin, enhancing portrait detail and making the image more convincingly real.
Creating Depth in Eyes and Hair
The eyes are often considered the most expressive part of a portrait, requiring careful attention to shading for accuracy. Focus on the curvature of the eye, using light pencil grades for highlights (such as the glimmer of light on the eyeball) and softer pencils for the deep shadows around the eyelid and lashes. Paying attention to the details of the iris with techniques like elliptical strokes can produce realistic depth and vibrancy.
For hair, achieving individual strands and depth is key. Use directional strokes to follow the natural flow of hair, incorporating crosshatching to build volume and layering different pencil grades to create depth. Highlighting specific strands with a kneaded eraser can add shine and dimension, enhancing the lifelike quality of your work.
Balancing Contrast and Harmony
Balancing contrast is an essential aspect of realistic drawing. Too much contrast can overshadow delicate features, while too little can result in a flat image. Utilize contrast to draw attention to key features of the face, such as the eyes, nose, and mouth, while maintaining harmony with the overall portrait.
Experiment with different pressure levels and pencil grades, allowing certain areas to pop while ensuring the entire portrait remains cohesive. Practice using a limited value range on certain parts of the face, then expand to encompass a richer spectrum, providing both realism and artistry.
Troubleshooting Common Shading Mistakes
Even experienced artists can encounter common shading issues. Bleeding edges, unintended smudging, and uneven tones can detract from the realism of graphite portraits. To counteract these issues, maintain regular pencil sharpening to ensure precise lines and controlled shading. Use a light touch to prevent excess graphite accumulation, and regularly lift darker areas with a kneaded eraser to reclaim highlights.
Additionally, adopt a 'less is more' approach: begin with lighter shades and gradually introduce darker values, rather than starting too dark, which can be difficult to reverse. This technique enhances the accuracy of your shading and prevents common pitfalls that compromise portrait detail.
Perfecting Your Shading Techniques
Refining shading techniques involves consistent practice and experimentation. Every portrait provides an opportunity to explore different methods and materials. Consider keeping a sketchbook dedicated to shading exercises, experimenting with new techniques, stark contrasts, and soft ensemble work.
Ultimately, the artistry of graphite portraits lies in the artist's ability to faithfully render reality while imparting their distinct vision through subtle shading nuances. Advanced shading techniques not only elevate the realism of graphite drawings but also introduce new layers of expression and creativity. As you continue your artistic journey, remember that every stroke is a step toward mastering the delicate dance between light and shadow in your artwork.