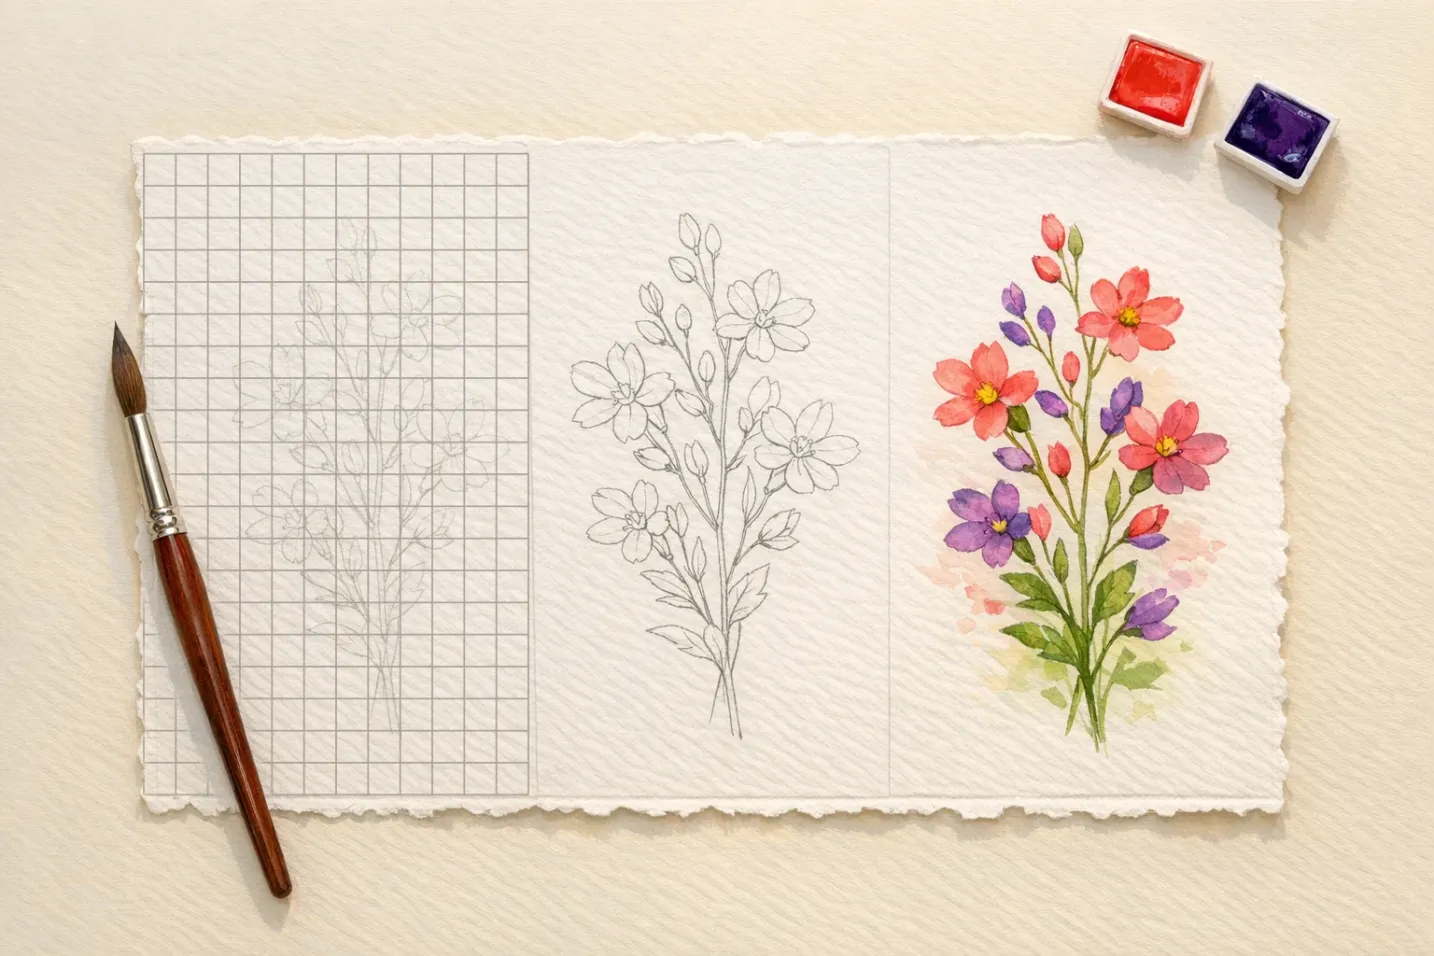

A pencil grid works under watercolour, but only if you get it off the paper before you paint. Graphite that is still on the sheet when the first wash goes over it does not stay erasable: the gum arabic in the paint seals it, and from that moment the line is part of the painting.
So the whole method comes down to a sequence: grid the reference, transfer the drawing lightly, erase the grid completely, then paint. This article covers each of those, plus which pencil to use (it is not the one most grid tutorials recommend) and what to do when a line does survive into the finished piece.
What You Need
Paper
Weight. 140 lb (300 gsm) is the standard working weight and the one to buy, but it does not stay flat on its own: it cockles under a wet wash, which is why the stretching step below exists. 300 lb (640 gsm) stays flat without stretching and costs roughly twice as much. Anything under 140 lb cockles badly enough that a grid drawn on it stops being square once it is wet.
Surface. Graphite settles into the valleys of cold press texture, so clearing a line completely is harder there: the eraser reaches the peaks long before the hollows. On hot press the lines sit on top and lift cleanly, which makes it the easier sheet to grid and suits the crispness of botanical work. The trade is that washes dry faster on hot press and are less forgiving, so a wet edge left standing becomes a hard line.
Sizing. Watercolour paper is treated with gelatine or a synthetic size so paint sits partly on the surface instead of sinking in like blotting paper. A sheet sized both internally and externally takes masking fluid and survives lifting. A lightly sized sheet drinks the paint on contact, which makes corrections close to impossible.
Stretching. Stretch the paper first, grid it afterwards. The sheet expands while wet and does not return to the same dimensions, so a grid drawn before stretching comes back distorted. Tape all four edges with gummed tape and let it dry fully.
Pencil and Eraser
Use an HB, and hold it lightly. Most grid tutorials, including the ones on this site for graphite and charcoal, recommend a 2H, because on drawing paper a hard pencil stays pale and lifts cleanly. Watercolour paper is different. A hard point presses a groove into a soft, absorbent sheet, and when the wash arrives the pigment runs into that groove and dries as a line darker than the pencil mark ever was. Erasing does not help: the graphite comes off, the groove stays, and the groove is what you are seeing. HB gives you a visible line at a pressure light enough not to emboss. Anything softer smudges into the wash and greys the colour above it.
- Draw from the shoulder, not by pressing. If you can feel a ridge on the back of the sheet, you are pressing too hard.
- Test on a scrap first: draw a line, erase it, then float a wash across where it was. If a dark line appears, lighten your hand.
- Avoid watercolour pencils for grid lines; they dissolve into the washes and stain the painting.
Use a kneaded eraser for the removal: it lifts graphite by pressing and pulling rather than abrading. A hard eraser scuffs the sizing, and a scuffed patch takes colour differently from the paper around it.
Paint and Brushes
Paint. Pigment choice matters more in the first layers than in the last. Phthalo Blue (PB15) is a staining pigment: it drives into the fibres and will not lift out again. Ultramarine Blue (PB29) is non-staining and granulating, so it settles into the paper's texture and lifts back with a damp brush. Cadmium Yellow (PY35) is opaque and covers what lies underneath rather than glowing through it. Put the lifting pigments down first, and keep the stainers for the last darks.
Brushes. Small rounds in sizes 2 to 6 work inside a single cell; a flat carries a wash across several.
Masking fluid. If part of the painting has to stay pure white paper, mask it before the first wash. Apply it with an old brush or a silicone shaper, never with good sable, because the latex sets hard in the ferrule and destroys the brush. Put it on dry paper only. Let it dry by itself rather than with a hairdryer: heat bonds it to the sheet permanently. Take it off within a day.
For watercolour sheets, use GridMyPic's Grid on Canvas mode: pick your real paper size (A4, A3 or custom dimensions in centimeters or inches) and export a PDF that prints at exactly that size. Measure one cell with a ruler to verify. Set up your sheet in the grid maker.
Grid the Reference
Reference and paper get the same number of equal cells, which gives both a shared coordinate system. Overlaying the grid digitally is quicker: our image grid maker does it from an uploaded photo. The physical alternative is clear acetate laid over the print, ruled with a permanent marker.
The number of cells has to match. The size does not: sixteen divisions across a six-inch reference and sixteen across a ten-inch sheet enlarge the image and leave every proportion intact.
How fine depends on the subject. Botanical work wants half an inch or smaller, because leaf venation and petal edges need more reference points than a broad shape does. Landscapes take one to two inches. Portraits want three-quarters of an inch to an inch, which works out at roughly eight to ten divisions across the width of the head, measured cheekbone to cheekbone. For a still life, size the grid for the hardest object in the group.
Whatever the number, keep every cell the same size. A grid with fine cells over the flowers and coarse ones over the background has stopped being a measuring instrument.
Transfer, Then Erase
Rule the paper grid first. Mark the divisions along all four edges, then rule between opposite marks rather than measuring each line individually, and label the coordinates in the margin so you can name a cell instead of counting to it. Then measure both diagonals: if they are not equal the grid is skewed, and every measurement you take from it carries that error.
Transfer one cell at a time, major shapes across the whole drawing before any detail. Keep the pencil at the pressure you tested on the scrap, and step back every few cells, because proportional errors are invisible at reading distance and obvious from two metres.
Then stop and erase, before any paint touches the sheet. Not "lighten to faint guides": erase. The last section explains what happens if you skip this.
Never spray fixative to hold the drawing down. Fixative resists water. A wash laid over it beads up and dries blotchy and uneven, and there is no version of this that works under watercolour. Mask the whites instead, and plan the painting order light to dark before the first wash.
Paint Across the Grid, Not Inside It
The grid did its work in the drawing. It should have no authority over the painting.
Wash across the cells. Plan each wash by the shape it covers, not by the cells it crosses, and keep a wet edge. Watercolour dries at the boundary where you stopped, so stopping at a cell line puts a hard edge exactly where the painting needed continuity. Mix more paint than the passage looks like it needs: a wash that runs dry halfway is the other common source of a seam, and a second mix will not match the first.
Work cell by cell only for isolated detail. A flower centre, an eye, a single leaf: something surrounded by dry paper on every side. Let each one dry before you start the one beside it.
Keep the gridded reference in view throughout, with a pointer on the cell you are reading from. What you are checking now is value and colour; placement was settled in the drawing. Build in three passes: light washes, then middle values, then darks and accents. Assign each area a value from one to ten before mixing anything. A painting with the right values in the wrong colours still reads as its subject. The reverse does not.
When It Goes Wrong
Problem: grid lines showing through the finished washes
Once a wash has dried over graphite, the gum arabic that binds the paint has sealed the pencil into the surface. It is not a stubborn line, it is a line that is no longer on top of the paper, and yellows seal hardest. Scrubbing at it with a damp brush lifts the paint and leaves the graphite, so you end up with a pale stripe and the line.
The only reliable fix is upstream. Erase the grid completely, before any paint touches the sheet:
- Transfer the drawing square by square, then stop.
- Lift the grid lines off with a kneaded eraser, dabbing rather than rubbing, until nothing of the grid remains. Keep only the contours of the subject.
- Hold the sheet at a low angle to a window. Anything you can still see will be visible in the finished painting.
Two habits make step 2 easy. Use the pencil lines as a guide, not an edge: paint up to a line rather than over it, and whatever survives stays liftable. And erase as you go, clearing the pencil you no longer need before the next wash covers it.
If a line has already been sealed in, you have three honest options and none of them is invisible: glaze a darker passage over that area so the line disappears into it, cover it with a touch of white gouache and repaint, or leave it. A visible construction line is not a ruined painting, but pretending it can be scrubbed out is how a good painting gets a hole rubbed in it.
Problem: stiff, mechanical results
Values jump at the cell boundaries, or the brushwork has one character everywhere. Both come from treating the grid as a painting boundary rather than a drawing aid. Vary the brushwork across the lines, save the loosest passages for after the grid is gone, and let atmospheric backgrounds ignore the structure entirely.
Problem: proportions that came out wrong anyway
Check the grid before you blame the transfer. Unequal diagonals, a miscounted division, and a reference grid with a different number of cells from the paper grid all produce the same symptom. Once painting has started you cannot re-measure: extend an element past where the grid said it ended, let the composition absorb the discrepancy, and check both diagonals before you rule the next grid.
Common Questions About Grid Method for Watercolor
For complementary studies, explore botanical drawing with grids and charcoal shading with grids.
Ready to Try the Grid Method?
Put these techniques into practice with our free grid generator tool—trusted by 170,000+ artists worldwide.
Create Your Grid Now →