GridMyPic Logo
  1. Home
  2. /
  3. Blog
  4. /
  5. How to Use Grids to Learn Drawing in Perspective
Dienstag, 17. September 2024

How to Use Grids to Learn Drawing in Perspective

Unlock the secrets of drawing in perspective with the Grid Method! This technique simplifies complex scenes into manageable sections, enabling you to master proportions and depth effortlessly. Discover how grids can transform your sketching skills today!

How to Use Grids to Learn Drawing in Perspective

How to Use Grids to Learn Drawing in Perspective

Learning to draw in perspective is a fundamental skill for artists, whether you're aiming to create realistic landscapes, architectural illustrations, or detailed figure drawings. One practical and highly effective method to master perspective drawing is the Grid Method. This technique helps artists achieve accurate proportions and maintain consistency in their sketches. In this blog post, we'll delve into the art techniques associated with the Grid Method and how you can use it to enhance your perspective drawing skills.

Perspective drawing is a method used to represent three-dimensional objects on a two-dimensional plane (like paper or a canvas) accurately. The goal is to give the viewer a sense of depth, making the scene appear lifelike. While perspective can seem daunting at first, using grids can simplify the learning process significantly.

Understanding Perspective Drawing

Perspective drawing is grounded in three primary concepts: vanishing points, horizon lines, and convergence lines. To start, let’s briefly revisit these concepts:

  1. Vanishing Points: These are points on the horizon line where parallel lines appear to converge. There can be one, two, or even three vanishing points depending on the type of perspective (one-point, two-point, or three-point perspective).
  2. Horizon Line: This represents the viewer's eye level and provides a reference point for drawing objects in perspective.
  3. Convergence Lines: Also known as orthogonal lines, these guide the angles of objects so they appear to recede into space.

What is the Grid Method?

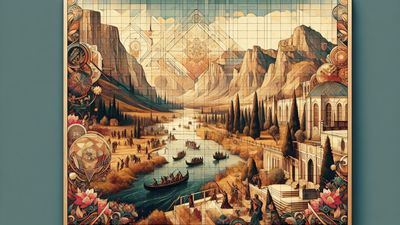
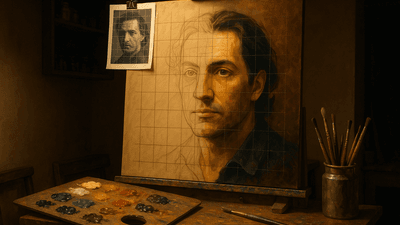
The Grid Method involves drawing a grid over your reference image and replicating a similar grid on your drawing paper. By focusing on one square at a time, you can more easily capture the details and proportions of the reference image. This method acts as a guide to help maintain accuracy and proportion in your sketches.

Why Use the Grid Method for Learning Perspective Drawing?

Using a grid enables you to translate complex compositions into manageable sections. This technique is especially beneficial when learning to:

  • Maintain Proportions: The grid acts as a measuring tape spread across your canvas. By comparing the size of objects within each grid cell, you can ensure that proportions remain consistent.
  • Simplify Complex Shapes: Breaking down your reference into smaller sections allows you to focus on individual details without feeling overwhelmed by the entire composition.

Setting Up Your Grids

Before jumping into sketching, you need to set up your grids both on the reference image and your drawing surface. Here’s a step-by-step guide:

  1. Choose Your Reference Image: Start with a simple reference image that clearly shows perspective. Architectural photos, street scenes, or simple still lifes work well.
  2. Draw the Grid on Your Reference Image: Use any image editing software to draw a grid over your reference image. Alternatively, you can print the image and use a ruler to draw the grid manually. Divide the image into equal squares (e.g., a 4x4 or 6x6 grid).
  3. Prepare Your Drawing Paper: Draw the same grid on your drawing paper. Ensure that the grid squares on the paper match the proportions of those on the reference image.

Sketching with the Grid Method

With your grids in place, you’re ready to begin sketching. Here’s how to proceed:

  1. Start with the Major Lines: Identify the horizon line and vanishing points in your reference image. Lightly sketch these on your drawing paper. These will guide the alignment of your grid and subsequent drawing.
  2. Focus on One Square at a Time: While looking at each grid cell in the reference image, draw the content of that square on the corresponding grid cell on your paper. Pay attention to how lines intersect the borders of each square to maintain accurate proportions.

Common Mistakes and Tips

Common Mistakes:

  1. Ignoring the Vanishing Points: Always keep an eye on your vanishing points to ensure that lines converge correctly.
  2. Proportion Errors: Double-check the relationships between objects within your grid cells to avoid disproportionate drawings.
  3. Focusing Too Much on Details Initially: Start with major lines and shapes before delving into intricate details.

Tips for Improvement:

  • Consistent Practice: The more you practice drawing with grids, the better you'll become at visualizing and translating complex scenes into your artwork.
  • Adjust Grid Size: Use smaller grid squares for more detailed works and larger squares for simpler compositions.
  • Experiment with Different Perspectives: Practice one-point, two-point, and three-point perspectives to build a robust understanding of space and depth.

Advanced Techniques

Once you're comfortable using the grid method for basic perspective drawing, you can explore more advanced applications:

  1. Curvilinear Perspective: This technique uses curved lines instead of straight convergence lines to create a fisheye or wide-angle lens effect. While more complex, grids can still help you maintain accuracy.
  2. Dynamic Perspective: Experiment with exaggerated vanishing points and angles to create dynamic and engaging compositions. Grids help you keep track of proportions even in these more dramatic scenes.

Final Thoughts

The Grid Method is an invaluable tool in your artist toolkit for learning perspective drawing. It simplifies the complexities of capturing proportions and details, making the learning process more manageable and effective. By practicing consistently and experimenting with various perspectives, you'll develop a deeper understanding of how to create lifelike and dynamic drawings.

Incorporate these art techniques into your routine, and you'll see significant improvements in your sketching skills. Remember, mastering perspective drawing is a journey, and using grids is a powerful step in the right direction. Happy drawing!

Further Reading and Resources

To expand your knowledge and skills, consider exploring the following resources:

  • Books and Tutorials: Look for books that focus on perspective drawing techniques.
  • Online Courses: Many platforms offer courses specifically designed to improve your understanding of perspective.
  • Art Communities: Join forums and social media groups where you can share your work, seek feedback, and learn from others.

By leveraging these resources and integrating the Grid Method into your practice, you're well on your way to becoming proficient in perspective drawing.