Introduction: Why Grid Drawing Works
If your drawings often feel “off” even when you try hard, it’s usually not a talent problem. It’s a measuring problem. The grid method is a practical way to measure proportions without advanced drawing skills. You place a grid over a reference image, draw the same grid on your paper, then copy what you see in each square. This reduces guessing and makes accuracy repeatable.
What the grid really does is give you many small checkpoints. Instead of trying to place an eye “in the right spot,” you place it inside a specific square, at a specific distance from the grid lines. You’re turning a big, fuzzy problem (“draw a face”) into dozens of small, clear problems (“in square B3, the eyelid touches the right grid line at mid-height”).
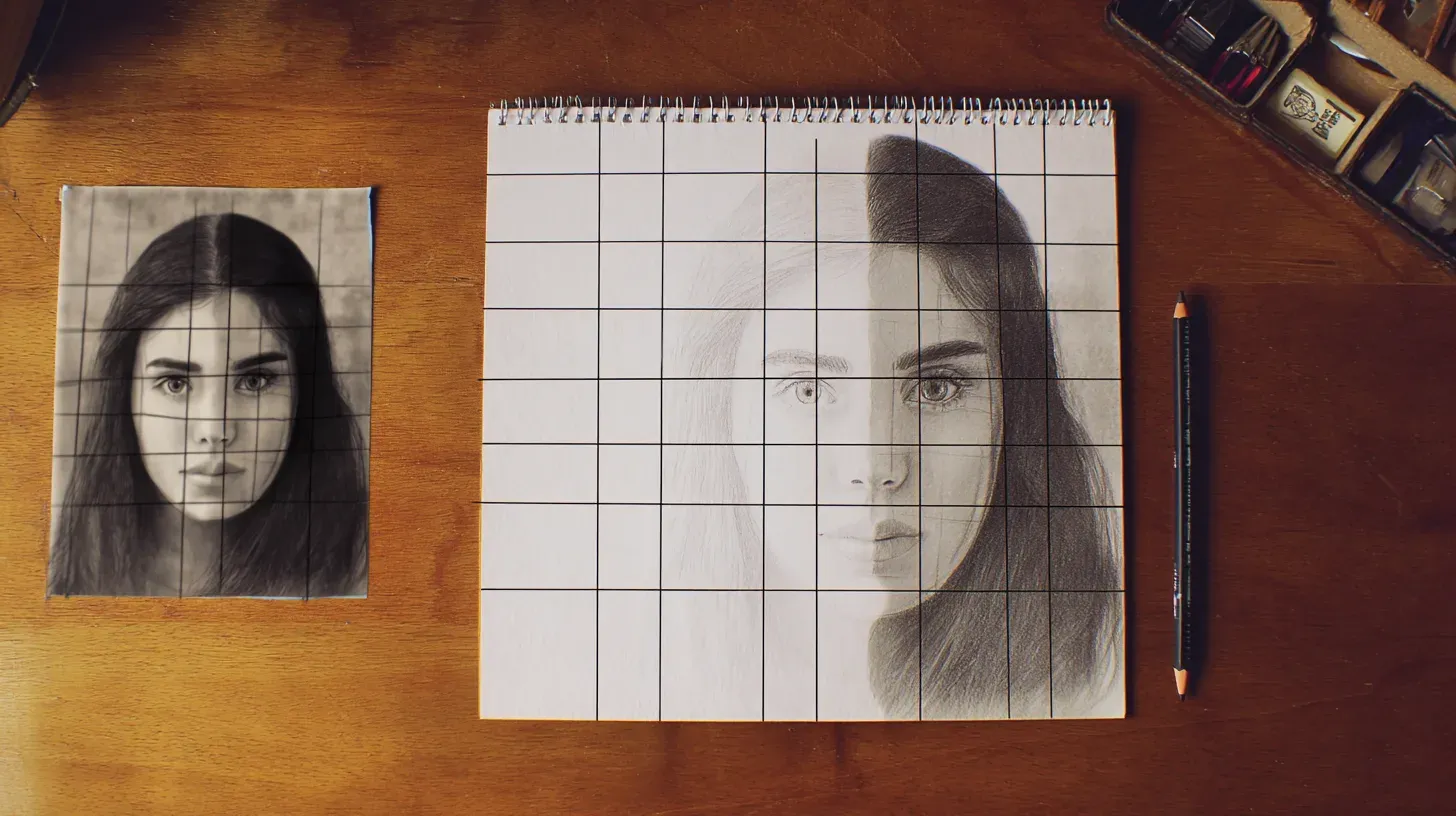 Image was generated with AI
Think of it like using a map grid. You don’t “guess” where a city is. You locate it in the correct square and then refine the position. Over time, grid practice improves your observation and proportion skills, and you’ll need the grid less often.
What You’ll Learn
You’ll learn how to choose a grid size, draw a matching grid cleanly, copy accurate shapes using “anchor points,” check proportions while you work, and fix errors early (before they spread across the whole drawing).
A Brief History
The grid method is old because it solves a timeless problem: transferring an image accurately from one size to another. Artists used gridded frames, strings, and measured squares long before photography existed.
Today we can add grids digitally in seconds, but the skill is the same: observation and placement. The grid isn’t “the art.” It’s a scaffold that helps you build accurate proportions, then you add line quality, shading, and style on top.
Why Use the Grid Method?
Here are the real reasons the grid method is so effective for beginners:
Get Accurate Proportions
Proportion errors usually happen when you “eyeball” distances. A grid replaces eyeballing with measurement: you place key points by their distance to the nearest grid lines, then connect them.
Without Grid
- Hard to place features consistently
- Small errors compound across the drawing
- More “starting over” moments
- Frustration comes from uncertainty
With Grid
- Clear placement targets in each square
- Errors are easier to locate and fix early
- Better accuracy even if your lines are “messy”
- Confidence comes from checkpoints
Learn to See Better
Grid drawing trains a specific skill: seeing shapes instead of symbols. Beginners often draw an “eye symbol,” not the actual angles and curves they see. Working inside a square makes it easier to focus on abstract shapes, angles, and where edges touch the grid lines.
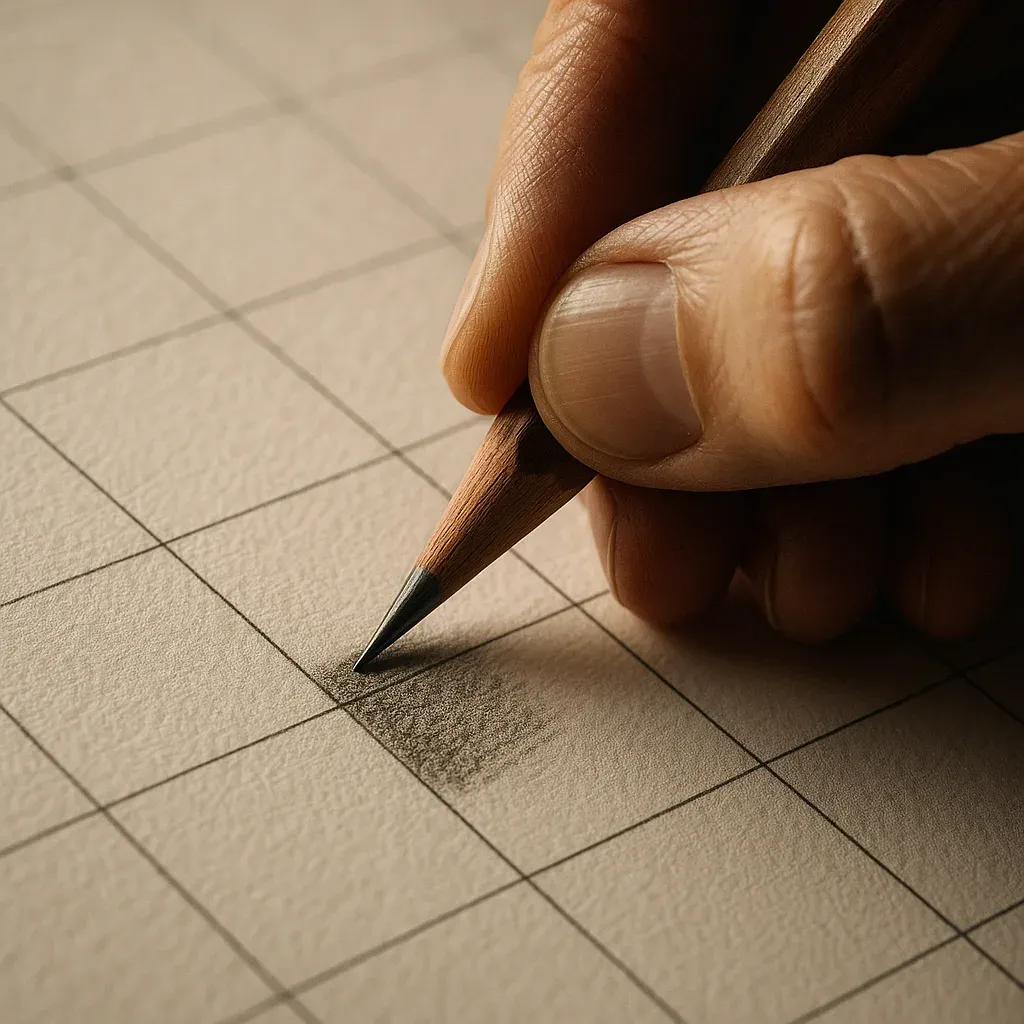 Image was generated with AI
Build Confidence
You can tackle subjects that would normally feel overwhelming (faces, animals, detailed photos) because you always know what to do next: locate key points in the current square, draw the simple shapes, move on.
What You Need to Start
You don’t need fancy tools. You do need clean measuring and light lines.
If Drawing by Hand
- Paper: Smooth paper is easier to erase (sketchbook paper is fine)
- Ruler: A clear ruler helps you see what you’re measuring
- Pencils: 2H/H for the grid + light sketch, HB for darker final lines
- Eraser: Kneaded eraser (gentle) or a clean white eraser
- Optional: A clipboard or hard backing so your grid lines stay straight
If Using Digital Grids (Recommended for Beginners)
Digital tools like GridMyPic remove the “setup friction” so you can spend your energy on drawing:
- Pick a good reference: Clear lighting and strong shapes beat “pretty” filters
- Add a grid instantly: You choose the number/size of squares
- Print or view beside you: Printing is easiest for beginners, but a tablet/laptop works too
- Draw on paper: You still learn the same core skill: accurate placement
Beginner Setup That Works
If you want the smoothest start, use this exact setup:
- One sheet of smooth paper (A4/Letter)
- 2H/H pencil + HB pencil
- Ruler + eraser
- A printed reference with a grid (or a tablet/computer with the grid visible)
Keep your grid light and your corrections gentle. That’s the “secret” most beginners miss.
How to Use Grids: 3 Simple Steps
This is the full workflow. It’s simple, but not sloppy. Each step has a purpose.
Step 1: Get Your Reference with a Grid
Choose a reference that’s beginner-friendly:
- Clear silhouette: You can easily see the outer shape
- Simple lighting: Avoid extreme shadows that hide edges
- Not too tiny: If the head is 2cm tall on your reference, details will be hard
Then add a grid. Two rules matter most:
- Use squares you can actually draw: For beginners, 2–4cm (about 1–1.5") squares on your paper are comfortable
- Use enough squares: More squares = more checkpoints. For a portrait, aim for ~8–12 squares across the width of the head area
Quick Grid Choice (Easy Defaults)
- Portrait (head/shoulders): 10×12 to 12×14 squares
- Animal head: 8×10 to 12×12 squares
- Simple object (mug, fruit): 6×6 to 8×8 squares
Don’t stress “perfect” numbers. Choose a grid where each square contains manageable information.
Step 2: Draw Matching Grid on Your Paper
This is where many beginners accidentally ruin the method: the grid on the paper must match the reference grid’s shape. If your reference is 8 squares wide and 10 squares tall, your paper must also be 8 wide and 10 tall (not a random square).
How to draw a clean grid (fast and accurate):
- Decide your square size: Start with 2–4cm squares. Lightly mark tick marks along the top and left edges.
- Check the rectangle: Before drawing all lines, confirm the full grid rectangle fits your paper.
- Draw border first: Lightly draw the outer rectangle of the grid area.
- Draw vertical lines: Use your tick marks. Keep pressure light (2H/H pencil).
- Draw horizontal lines: Same method. Keep lines consistent and light.
- Label it: Columns A, B, C… across the top; rows 1, 2, 3… down the side.
Pro Tip: Use “Light Grid, Dark Drawing”
If your grid is darker than your drawing, you’ll fight it the entire time. Keep the grid faint and the drawing readable. You can always darken lines later. Erasing deep grooves is much harder.
Step 3: Copy What You See, Square by Square
The goal is not to “draw the object.” The goal is to copy edges and positions accurately. Use this repeatable micro-process for every square:
The Square-by-Square Process:
- Find 2–4 “anchor points”: Where does an edge touch a grid line? Where does it cross the middle? Mark those points lightly.
- Compare distances: Is the point closer to the top or the center line? Closer to the left or right line? (You can estimate halves and quarters inside each square.)
- Connect with simple shapes: Straight segments first, then curves. Curves become easier when your anchor points are correct.
- Check angles: Ask: “Does this line tilt up or down?” Compare it to the grid lines (vertical/horizontal).
- Move on only when the square reads correctly: Don’t perfect details yet. Get placement and big shapes right first.
Where Beginners Improve Fastest
- Edges crossing grid lines: These are your best checkpoints.
- Negative shapes: Draw the “empty” shapes between features (space between nose and cheek, gaps between fingers).
- Big-to-small: Outline and major landmarks first, details last.
Mini Checklist (Use While Drawing)
If something looks wrong, don’t guess. Check these in order:
- Wrong square? Confirm you’re in the correct row/column (labels help).
- Wrong anchor points? Re-check where edges touch/cross grid lines.
- Wrong angle? Compare the tilt against the grid’s horizontals/verticals.
- Too much detail too early? Simplify back to big shapes and landmarks.
Drawing Tips That Actually Help
Start With Simple Subjects
If you’re brand new, start with a mug, fruit, a simple toy, or an animal head. Portraits are doable, but they punish small proportion mistakes. A simpler subject lets you focus on the method instead of fighting complexity.
Draw What You See, Not What You Think
Your brain tries to replace observation with symbols (“an eye,” “a nose,” “a leaf”). When that happens, your drawing becomes generic. Force observation with questions like: “Is this edge straight or curved?” “Where does it touch the grid line?” “Is it above or below the midline?”
Work One Square at a Time
Don’t jump around randomly. Work in an order that keeps you oriented: start with the biggest shapes (outer contour), then major landmarks (eyes, nose base, mouth corners), then smaller shapes. Many people like left-to-right, top-to-bottom. Others prefer “landmark-first.” Pick one system and stick to it.
When the Subject Has Depth, Add Perspective
A grid places things where they are in the photograph. It does not explain why the far end of a table looks narrower, or why a street seems to close in. For buildings, rooms and streets, read the picture's perspective before you draw a cell: find the horizon line, which is your eye level, then decide which view you are in: one-point perspective for a corridor or a road seen head on, two-point perspective for a corner view of a house, three-point perspective when you look up at a tower or down into a courtyard, and curvilinear perspective when a wide-angle photograph bends its straight lines. The perspective grid tool lays the vanishing lines over the photo, and the drawing grid keeps the proportions inside them.
Use Light Pressure
Light lines let you correct without damaging the paper. If you press hard, the paper dents and even erased lines leave scars. Use 2H/H for the grid and early sketching, and only switch to HB when the proportions are working.
Top 4 Mistakes to Avoid
These are the mistakes that cause “it looks wrong but I don’t know why.” Fix them and your results jump immediately.
Mistake 1: Wrong Grid Ratio
The Problem
Your reference grid is, for example, 8 squares wide by 10 squares tall, but you draw a different grid on paper (or you “fill the page” and change the rectangle). This stretches or squashes the subject.
The Solution
Match the grid count exactly (8 wide by 10 tall). Square size can change, but the grid’s rectangle shape must stay the same. If you need a bigger drawing, make each square bigger, not a different number of squares.
Mistake 2: Drawing Symbols Instead of Shapes
The Problem
You draw “an eye” or “a nose” from memory. The result is a symbol, not the actual angles and shapes in the reference.
The Solution
Treat each square like an abstract design. Place anchor points first (crossings/touches), then connect them. If you keep “naming” things, briefly flip the reference upside down to force observation.
Mistake 3: Pressing Too Hard
The Problem
Heavy lines lock you in too early. Corrections damage the paper and the drawing starts to look muddy.
The Solution
Use a 2H/H pencil and “whisper lines” until the proportions work. Darken only after you’ve checked major landmarks.
Mistake 4: Rushing the Process
The Problem
You keep moving forward even when a section feels “a bit off.” That small error spreads, and later everything needs to be “fixed,” which usually means redrawing.
The Solution
After every 4–6 squares, do a quick check: compare big angles, landmark positions, and the outer contour. Fix early, because early fixes are small fixes.
Remember
When something looks wrong, you don’t need new talent. You need a better check. Go back to the grid crossings and anchor points. If those are correct, the drawing will usually correct itself.
Tips for Better Results
Once you can copy accurately, the next step is making the process smoother and your drawings cleaner.
Choosing the Right Grid Size
- If you miss details: Use more squares (smaller squares) so you have more checkpoints
- If you feel overwhelmed: Use fewer squares (larger squares) and focus on big shapes first
- Beginner sweet spot: Each square should contain only a few important edges, not an entire eye with lashes
Working Smarter
- Label your grid: A–L across, 1–14 down. This prevents “I copied the wrong square” errors.
- Cover the reference: Use a scrap paper window to isolate the current square if you get distracted.
- Start with “map lines”: Outer contour, centerline of the face, eye line, base of nose, mouth line.
- Do quick checks: Compare angles and distances between landmarks before you detail.
Practice Suggestions
Beginner Practice Plan
- Week 1: 3–5 small objects. Focus on clean grids + accurate outer contour.
- Week 2: One still life with 2–3 objects. Practice anchor points and angles.
- Week 3: A simple portrait (front view, good lighting). Focus on landmark placement.
- Week 4: Choose one: animal head, landscape, or a second portrait. Add light shading after the drawing is accurate.
Drawing Different Subjects
Different subjects require different levels of grid “support.” Use more squares for subtle shapes (faces), fewer for big shapes (landscapes).
Portraits
- Use smaller squares: 1cm for faces, 2-3cm for hair
- Start with big landmarks: Head outline, center line, eye line, base of nose, mouth line
- Place features as shapes: Eye sockets first, then eyelids; nose as planes/edges, not a “nose symbol”
- Use symmetry carefully: Place one eye, then check the other against the grid, and don’t “mirror” blindly
- Common checkpoint: Corners of eyes/mouth and bottom of nose should land at consistent grid positions
Still Life
- Perfect for practice: Objects don't move
- Start simple: One object before groups
- Round shapes tip: Mark where the curve touches the square edges, then connect those points smoothly
Landscapes
- Use larger squares: 3-4cm works well
- Block in big shapes: Horizon line, major tree/building masses, large shadow shapes
- Save texture for last: Use the grid for placement, then add detail with simplified texture marks
Animals
- Similar to portraits: Smaller squares for faces
- Use photos: Animals move too much
- Basic forms first: Skull/torso shapes first, then features; fur is the final layer
Quick Grid Size Guide
- Detailed faces: 0.5-1cm squares
- Full figures: 2-3cm squares
- Simple objects: 2-3cm squares
- Landscapes: 3-4cm squares
- When unsure: Start smaller
Digital vs Traditional
Both methods teach the same skill. The difference is how much time you spend on setup vs drawing.
Traditional (By Hand)
- Good for learning: Helps you understand how grids work
- No tech needed: Works anywhere with paper and ruler
- Takes time: 30-60 minutes to create a grid
- Can have mistakes: Hard to get perfectly straight lines
Digital (Using GridMyPic)
- Fast: Perfect grids in seconds
- Accurate: Computer-made lines are perfectly straight
- Easy to change: Try different grid sizes instantly
- Free to use: No cost to try
Which Should You Use?
For beginners, digital tools like GridMyPic are faster and easier. You can focus on learning to draw instead of spending time making grids. Once you understand the basics, you can try making grids by hand if you want.
Quick Resources
Essential Supplies
- Paper: Smooth drawing paper (Strathmore or Canson)
- Pencils: Range from H to B grades
- Ruler: Clear plastic ruler for creating grids
- Eraser: Kneaded or white eraser
Digital Tools
For instant grid creation, try GridMyPic’s Free Grid Maker. Upload an image, choose a grid, and export/print a clean reference.
Practice References
- Start with simple objects (fruits, basic shapes)
- Progress to faces and figures
- Use your own photos for unlimited practice