GridMyPic Logo
  1. Home
  2. /
  3. Blog
  4. /
  5. How to Paint Realistic Eyes in Oil
Donnerstag, 12. September 2024

How to Paint Realistic Eyes in Oil

Unlock the secrets to painting lifelike eyes in oil. Mastering this vital skill involves understanding eye anatomy, light and shadow interplay, and intricate detailing to bring your portraits to life. Dive into our expert guide and elevate your artistry today.

How to Paint Realistic Eyes in Oil

How to Paint Realistic Eyes in Oil

Creating lifelike eyes in an oil painting is an essential skill for any artist striving to capture realism in their portraits.

Understanding Eye Anatomy

Before you start painting, it’s crucial to understand the basic anatomy of the eye. The eye is not just a flat circle but a complex, spherical object with parts including the iris, pupil, sclera, eyelids, and eyelashes.

  1. The Eyeball: The eye's round, spherical shape will influence how you render light and shadow.
  2. The Iris and Pupil: The iris, the colored part, and the pupil, the black center, are essential for capturing the subject's emotion and personality.
  3. The Sclera: The white of the eye, also known as the sclera, is rarely stark white; it often contains subtle blues, grays, and pinks.
  4. Eyelids and Eyelashes: These add depth and dimension to your eye. The upper eyelid typically casts a shadow over the eye, adding to its realism.

Choosing the Right Materials

Quality materials can make a significant difference in your results. Here are some recommendations:

  • Oil Paints: High-quality oil paints like Winsor & Newton or Gamblin.
  • Brushes: Fine detail brushes, including rounds and filberts.
  • Canvas: A smooth canvas or gesso board for fine detail.
  • Mediums: Linseed oil or walnut oil for better flow and blending.

Preparatory Sketching

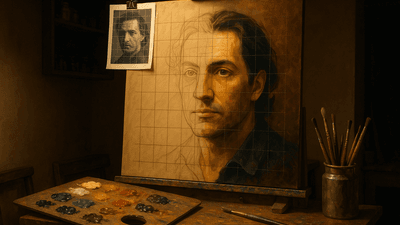
Begin with a light sketch using a soft pencil or a thin brush and diluted paint. Focus on getting the proportions correct. The eye is generally almond-shaped, but this can vary depending on the individual subject.

20240912_how_to_paint_realistic_eyes_in_oil_content.jpg

Blocking in Colors

Start by blocking in the main colors of the eye. Use a medium-sized brush and diluted paint to lay down the basic colors. Here are some steps:

  1. The Sclera: Mix a base color using titanium white, a touch of ultramarine blue, and a hint of burnt umber.
  2. The Iris: Choose your main color (blue, green, brown) and add variations. For brown eyes, use burnt sienna and raw umber with hints of yellow and red. For blue eyes, use ultramarine blue with hints of titanium white and a touch of burnt sienna.
  3. The Pupil: Use pure black or a mixture of ultramarine and burnt umber for a more complex black.

Adding Light and Shadow

To create depth, skillfully add shadows and highlights:

  1. Light Source: Identify your light source. The main highlight will typically appear on the iris and the opposite side will have the shadow.
  2. Transitions: Smooth transitions between colors are essential. Use a soft brush to blend the edges.
  3. Reflections: Add small, sharp reflections on the corneal surface. Use pure white for the reflection points, but keep these limited to avoid a cartoonish look.

Detailed Work on the Iris

Here's where you can really bring out the Painting Realism:

  1. Striations: Use a fine liner brush to add the little lines emanating from the pupil. These are key to making the iris look realistic.
  2. Color Variations: Don't be afraid to incorporate subtle variations. Add darker lines, lighter spots, and color shifts to give depth.
  3. Dappling: Use a stippling technique to dab tiny dots of contrasting color to add texture.

Final Touches

Adding the Eye Detail that makes your painting stand out involves:

  1. Eyelashes: These should be thin, vary in length, and slightly curled. Use a fine brush, and remember that eyelashes clump together in small groups rather than stand individually.
  2. Eyelids: Make sure the upper lid casts a shadow over the eyeball. Add slight creases and lines to enhance realism.
  3. Glazing: Apply thin glazes to bring out depth and richness. For example, a thin glaze of blue over the sclera can enhance the realistic appearance.

Practice and Refinement

Like any skill, painting Realistic Eyes in oil takes practice. Here are some tips for ongoing improvement:

  1. Study Photographs: Use high-resolution photos as references to study the interaction of light, shadow, and color.
  2. Practice Different Eyes: Paint eyes of different ages, ethnicities, and expressions to broaden your skill set.
  3. Seek Feedback: Engage with art communities and take constructive criticism to refine your techniques.

Mastering the art of Painting Realism in eyes is an ongoing process that involves acute observation, meticulous detailing, and a deep understanding of both anatomy and technique. Keep practicing and experimenting to bring your portraits to life, one eye at a time.