GridMyPic Logo
  1. Home
  2. /
  3. Blog
  4. /
  5. The Art of Cross-Hatching: Techniques for Adding Texture
Sonntag, 8. September 2024

The Art of Cross-Hatching: Techniques for Adding Texture

Unlock the secrets of cross-hatching to add stunning texture and depth to your drawings. Explore various techniques and discover how simple lines can transform your art into intricate masterpieces. Dive in and elevate your drawing skills today!

The Art of Cross-Hatching: Techniques for Adding Texture

The Art of Cross-Hatching: Techniques for Adding Texture

Cross-hatching is a powerful drawing technique that artists employ to create texture, depth, and tonal variation in their work. Unlike straightforward hatching, which uses parallel lines, cross-hatching involves layering intersecting sets of lines at different angles. This nuanced approach adds complexity and detail, making it a favorite among both classical and contemporary artists. In this blog post, we'll delve into various cross-hatching techniques and how they can be utilized to add texture to your drawings.

Understanding the fundamentals of cross-hatching is crucial for any artist aiming to develop a more intricate drawing style. It’s not just about randomly crisscrossing lines but involves methodical planning and execution to create a realistic effect.

Numerous factors like line density, spacing, and direction play a role in achieving the desired look. Let’s break down these elements and discuss how you can utilize them to elevate your art.

The Basic Principles of Cross-Hatching

Cross-hatching starts with a simple foundation of parallel lines, also known as hatching. Once your initial hatch lines are in place, the magic happens when you overlay another set of lines at a different angle. The number of layers and the angles between them can vary depending on the effect you're aiming for. Here are some core principles to keep in mind:

  1. Line Spacing: Closely spaced lines create darker tones, while wider spacing results in lighter tones. Adjusting the distance between lines enables you to control the shading.
  2. Line Direction: Changing the angle of the lines introduces different textures. For example, crisscrossing lines at perpendicular angles results in a more pronounced grid effect, which can denote rough surfaces.
  3. Line Thickness: Utilizing lines of varying thickness can add an extra dimension to your work. Thicker lines can be used for areas requiring more emphasis, while thinner lines can blend more seamlessly for subtle transitions.

Line Density and Layering

The density of lines plays a large role in creating the illusion of depth and texture. High line density will darken an area, mimicking the effect of shadow and giving volume to the subject. Conversely, low density suggests light and can make surfaces appear smoother. Here’s how you can manipulate these aspects:

  • Single Layer: One set of lines. This is useful for lighter textures, such as smooth skin or cloth.
  • Double Layer: Two intersecting sets of lines. This method is effective for medium textures like aged wood or short grass.
  • Multiple Layers: Multiple intersecting sets of lines. This is ideal for highly textured surfaces such as rocky terrain or coarse fabrics.

Understanding and experimenting with line density can hugely impact the realism and depth of your drawings.

Creating Texture Through Variation

When it comes to texture, variety is key. Cross-hatching alone can be diverse depending on how you vary your lines. Here are some techniques to play with:

  1. Random Cross-Hatching: Involves drawing lines at random angles. This is great for organic textures like foliage or animal fur.
  2. Structured Cross-Hatching: Uses well-defined angles and repeating patterns. Ideal for man-made objects where uniformity is needed, such as bricks or tiles.
  3. Mixed Cross-Hatching: Combines random and structured approaches to produce more nuanced textures.

Each type of cross-hatching can be tailored to replicate different material qualities within your artwork.

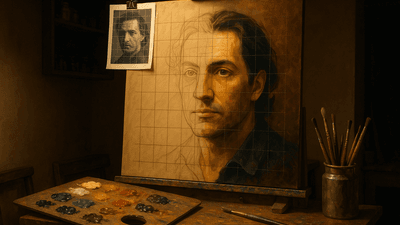
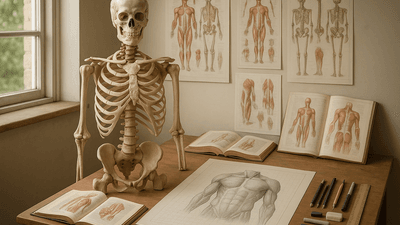
Drawing with cross-hatching technique

Mastering Shading Techniques

Cross-hatching is also a primary method for shading. Here, we'll discuss how to harmonize this technique with your shading to create compelling imagery:

Gradual Transition: Start with lines spaced far apart, gradually decreasing the distance between them. This technique is invaluable for rendering smooth transitions between light and dark areas.

Volume Shading: Alter the direction and density of your lines to follow the contours of your subject, giving it a more three-dimensional appearance. This is particularly effective when depicting rounded objects like the human form or spherical items.

Highlight and Shadow: Place denser, darker hatches in shadowed areas and lighter, less dense hatches where the light naturally falls, enhancing the realistic appearance of your work.

Key Tools for Effective Cross-Hatching

Utilizing the right tools can significantly improve your cross-hatching results. While many artists might rely on traditional tools like pencil and paper, experimenting with other mediums can also yield fantastic results:

  • Ink Pens: Great for creating permanent, crisp lines with varying thicknesses.
  • Charcoal: Offers a rougher texture, suitable for larger, bolder cross-hatching.
  • Digital Pens/Tablets: Surpasses the limitations of traditional methods, allowing for precise control over line weight and spacing, often with programmable pressure sensitivity.

Understanding the strengths and limitations of each tool will help you make informed decisions about which one to use for specific textures and effects.

Practical Exercises to Improve Your Cross-Hatching

Practice is indispensable when it comes to mastering cross-hatching. Here are some exercises to help you elevate your skills:

  1. Line Consistency: Fill a sheet with parallel lines, focusing on keeping them straight and evenly spaced.
  2. Angle Control: Overlay multiple sets of lines at varying angles, practicing smooth transitions between them.
  3. Gradient Creation: Shade a gradient from light to dark using cross-hatching, paying particular attention to your control over line spacing and density.
  4. Texture Replication: Choose different materials (like fabric, wood, and metal) and try to replicate their texture using cross-hatching techniques.

Practical Examples

Let’s consider some practical examples where cross-hatching can transform the texture and depth of your art:

Portraits: Apply fine cross-hatching for skin textures, using denser lines to depict shadowed areas and lighter hatching for highlights. This approach adds a lifelike quality to your portraits.

Landscape: Use varied line directions and densities to differentiate between elements like sky, water, and foliage. Structured cross-hatching can depict man-made structures effectively, while random cross-hatching can add a natural feel to elements like trees.

Still Life: Detail the textures of different objects using various cross-hatching techniques. For instance, structured lines can portray the rigidity of a glass vase, whereas random lines might better represent the irregular surface of a piece of fruit.

Conclusion

Mastering the art of cross-hatching opens up a world of possibilities for adding texture and depth to your drawings. By understanding the principles, experimenting with line spacing and direction, and utilizing the appropriate tools, you can create artwork that is not only visually compelling but also rich in texture. Don't forget the importance of practice; regular exercises will hone your skills and improve your control over this nuanced technique.

So grab your pens, paper, or digital tablet, and start experimenting with these techniques to bring your illustrations to life. Cross-hatching is an art form that, once mastered, can truly transform your artistic journey.

Feel free to share your cross-hatching masterpieces or any tips you’ve discovered along the way in the comments below. Happy drawing!