Techniques for Creating Atmospheric Perspective in Landscapes
Unlock the secrets of atmospheric perspective to transform your landscapes into deep, immersive scenes. Discover how mastering color, value, and clarity can add realistic depth to your art. Dive in and elevate your landscape painting skills today!
Mastering Atmospheric Perspective: Techniques for Captivating Landscapes
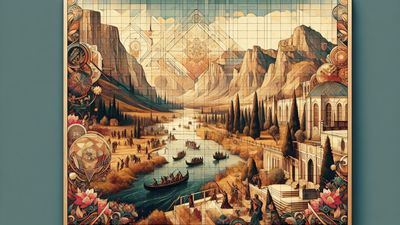
Creating landscape artwork that feels deep and engulfing isn't just about depicting a series of elements from foreground to horizon. Atmospheric perspective, also known as aerial perspective, is a technique that allows artists to create a realistic sense of depth by manipulating color, tone, and clarity. This blog post dives deep into the core principles and techniques that can help you master this essential skill.
Atmospheric perspective is a predominant technique used to replicate the natural phenomenon where objects appear less distinct and less saturated in color the farther they are from the viewer. This is due to the scattering of light and particles in the atmosphere impacting how we perceive distant objects. Understanding how to effectively apply atmospheric perspective can transform your landscapes from flat renditions to deeply immersive scenes.
Key Principles of Atmospheric Perspective
To grasp the nuances of atmospheric perspective, it's crucial to understand the foundational principles that make this technique effective:
- Color Change: As objects recede into the distance, their color shifts. Warmer tones (reds, oranges, and yellows) become less intense and shift towards cooler shades (blues and greens).
- Value Change: Distant objects tend to be lighter in value than those in the foreground. This helps to create a sense of depth and spatial relationships.
- Clarity: Elements in the foreground have sharper, more defined details. As objects move further away, they lose clarity and become more blurred and less detailed.
Techniques for Applying Atmospheric Perspective in Landscapes
1. Understanding Color Modulation
One of the fundamental techniques in implementing atmospheric perspective is the modulation of color. As you move objects from the foreground to the background:
- Foreground: Employ richer, more intense colors. This makes the elements appear closer and more vibrant.
- Background: Gradually desaturate the colors, moving them towards cooler tones. Utilize lighter and less intense shades to portray distance.
A practical approach is to use a color wheel and study the complementary colors. When painting a sunset, for example, the sun setting in the foreground will have rich oranges and reds, whereas the sky in the distance will transition to lighter, cooler grays and blues.
2. Value Gradients: The Role of Light and Shadow
Value, or the lightness and darkness of a color, plays an instrumental role in atmospheric perspective:
- Closer Objects: High contrast between light and shadow. This sharp differentiation creates a sense of volume and solidifies the proximity of objects.
- Distant Objects: Reduced contrast. Values become closer together, producing a more muted and hazy impression, which increases the perceived distance.
Creating a gradient using values effectively mimics the phenomenon of light scattering due to atmospheric particles. Utilize softer and more blended transitions of light and shadow for objects further away.
3. Manipulating Edges and Detail
Edge definition is another critical aspect:
- Foreground: Use hard edges and precise lines for clarity in near objects. Detailed textures can enhance the sense of tangibility.
- Background: Implement soft, diffused edges. Less-defined and blurred lines simulate the diffusion of light and the viewer's limited ability to discern far-off details.
A smart technique is to use glazing or layering for distant elements. This mimics the natural haze and creates soft transitions that contribute to the depth.
Tools and Mediums for Atmospheric Perspective
What tools you use can also substantially impact the effectiveness of your atmospheric perspective. Various mediums offer unique potentials and challenges:
1. Watercolors
Watercolors are fantastic for creating soft transitions and muted tones. Techniques such as wet-on-wet can help in achieving natural gradients, while dry brush techniques can be used for sharper details in foreground elements.
2. Oils and Acrylics
These mediums allow for richer textures and layering. Employ thin glazes to build up soft, distant effects, whereas thicker applications can be reserved for closer objects.
3. Pastels and Charcoals
These are brilliant for sketching and creating quick studies. The ease of blending with pastels or charcoals can help create atmospheric effects with minimal effort.
Practical Exercises and Tips
1. Observation and Study
The best teacher is nature itself. Spend time outdoors observing the changes in color, value, and clarity as objects recede into the distance. Photograph these scenes and try to replicate them in your sketches or paintings.
2. Layering Studies
Conduct studies by painting or drawing in layers. Start with a simple background, gradually incorporating middle ground and ending with the foreground. This progressive build-up can help you control and understand the depth creation.
3. Monochromatic Studies
Sometimes, stripping the color from your studies can help you focus on values. Create monochromatic studies to discern light and dark relationships effectively. Once mastered, these principles can smoothly transition into your colored works.
Advanced Techniques: Light and Atmospheric Conditions
Different times of day and weather conditions can dramatically alter the atmospheric perspective:
1. Morning and Evening Light
At dawn or dusk, the low angle of the sun increases atmospheric scattering. Colors become more vibrant with elongated shadows creating fascinating contrast dynamics.
- Morning Light: Often cooler tones with gentle, soft hues.
- Evening Light: Warmer tones invoking a golden or orange glow.
2. Weather Effects
- Fog and Rain: Increase the scattering effect. Even closer objects appear less distinct. Use more muted colors and lower contrast to simulate these conditions.
- Clear Sky: Higher visibility with sharper transitions and brighter colors. Distant objects, however, still remain less detailed and cooler in tone.
Conclusion
Mastering atmospheric perspective in landscapes isn't just about copying what you see; it’s about understanding the underlying principles and manipulating them to achieve a believable sense of depth. By focusing on color, value, and edge clarity, you can elevate your landscapes to create a powerful and immersive visual experience.
Dive into the practice, experiment with different techniques, and let the natural marvels of atmospheric perspective breathe life into your artwork. Each stroke you make brings you one step closer to capturing the captivating essence of the world through your artistic lens.