GridMyPic Logo
  1. Home
  2. /
  3. Blog
  4. /
  5. Step-by-Step Guide to Painting with Gouache
Sonntag, 8. September 2024

Step-by-Step Guide to Painting with Gouache

Unleash your creativity with our step-by-step guide to painting with gouache! From choosing the right materials to mastering advanced techniques, this guide will help both beginners and seasoned artists achieve vibrant, dynamic works of art. Dive in and transform your artistic journey today!

Step-by-Step Guide to Painting with Gouache

Step-by-Step Guide to Painting with Gouache

Gouache is a versatile and vibrant medium that sits somewhere between watercolor and acrylic paint. It offers unique properties that can elevate your artwork, whether you're a professional artist or an enthusiastic hobbyist. In this guide, we'll walk you through the step-by-step process of painting with gouache, from selecting the right materials to applying advanced techniques.

What is Gouache?

Gouache (pronounced ‘gwash’) is an opaque watercolor, meaning it has the solubility and flexibility of watercolor paint but with a higher pigment concentration and added white pigment. This gives it a characteristic opacity and the ability to be reworked with water even after drying.

It differs from acrylic paint (which is fully opaque and dries quickly to a plastic-like finish) and watercolor (which is more transparent and fluid). Gouache dries to a matte finish that makes it ideal for illustrations, designs, and fine art.

Essential Materials for Gouache Painting

Before diving into the step-by-step process of painting with gouache, you need to gather the right materials. Here's what you'll need:

  • Gouache Paints: High-quality brands like Winsor & Newton, Holbein, and Schmincke offer rich pigmentation and consistency.
  • Brushes: Synthetic or natural-haired brushes work well. Flat, round, and detail brushes will cover most tasks.
  • Palette: A mixing palette with ample space for blending.
  • Water: For diluting and cleaning brushes.
  • Paper: Heavyweight watercolor paper or mixed media paper is ideal to prevent warping.
  • Palette Knife: For mixing and applying thick layers of paint.
  • Masking Tape: To secure your paper and create clean edges if needed.

Step-by-Step Guide to Painting with Gouache

1. Preparing Your Workspace

Start by setting up a clean, organized workspace. Ensure good lighting and have your materials within easy reach. Secure your watercolor paper to a flat surface using masking tape to prevent movement and warping.

2. Mixing Colors

Gouache requires careful color mixing due to its opacity. Squeeze small amounts of paint onto your palette. Use a palette knife or a brush to mix colors. A little water can be added to achieve your desired consistency; too much water will make the paint act like watercolor, losing its opaqueness.

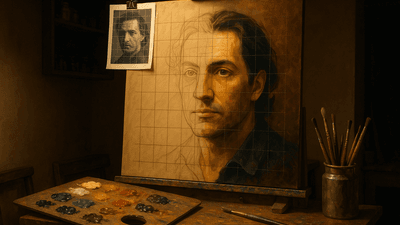
3. Sketching Your Design

Begin with a light pencil sketch on your paper. This will serve as a guide for your painting. Unlike watercolor, you can fully cover pencil lines with gouache, so there's room for minor inaccuracies.

4. Base Layers

Apply your base layers first. Start with mid-tones, then work your way to darker colors, and finally highlight areas. Use a flat brush for larger areas and a round brush for smaller details. The paint should be applied in thin, uniform layers to prevent cracking when it dries.


Step-by-Step Guide to Painting with Gouache Content Image


5. Building Detail

After the base layer dries, build up the details gradually. Gouache can be reactivated with water even when dry, so you can blend and adjust your layers. Use finer brushes for intricate work such as facial features, textures, or small highlights.

6. Creating Depth and Texture

To create depth and texture, use a combination of wet-on-wet and dry brush techniques. For wet-on-wet, apply a wet brush to already wet paint for soft edges and smooth blends. For dry brush techniques, load a brush with thick gouache and lightly drag it across the paper to create textured effects.

7. Final Touches and Adjustments

Assess your work and make any final adjustments. Add highlights to bring attention to focal points. Gouache's versatility allows you to paint over mistakes easily. Revisit any areas that need more vibrancy or shadow.

8. Sealing Your Work

Although gouache dries to a matte finish and doesn’t require varnishing, applying a thin layer of matte spray fixative can help protect your painting from moisture and smudging.

Tips for Painting with Gouache

  • Practice Makes Perfect: Gouache has a learning curve. Experiment with its properties and practice blending, layering, and mixing colors.
  • Work Quickly: Gouache dries faster than watercolor. Work efficiently to blend and adjust before it sets.
  • Avoid Too Much Water: Too much water can make gouache lose its opacity. Strive for a creamy consistency rather than a watery one.
  • Correct Mistakes Easily: One of gouache's best features is its ability to be reactivated. Mistakes can be lifted or painted over effortlessly.
  • Experiment with Surfaces: While heavyweight paper is ideal, gouache can be used on various surfaces, including toned paper, wood panels, and canvas boards.

Conclusion

Painting with gouache offers a balance of control and creativity, making it a favorite among illustrators and fine artists. By following this step-by-step guide and incorporating the tips mentioned, you can master the art of gouache painting. From your initial sketches to the final touches, each step will bring you closer to creating vibrant and dynamic works of art.

For those looking to dive deeper into the world of gouache, consider taking specialized courses or workshops to refine your skills. Happy painting!