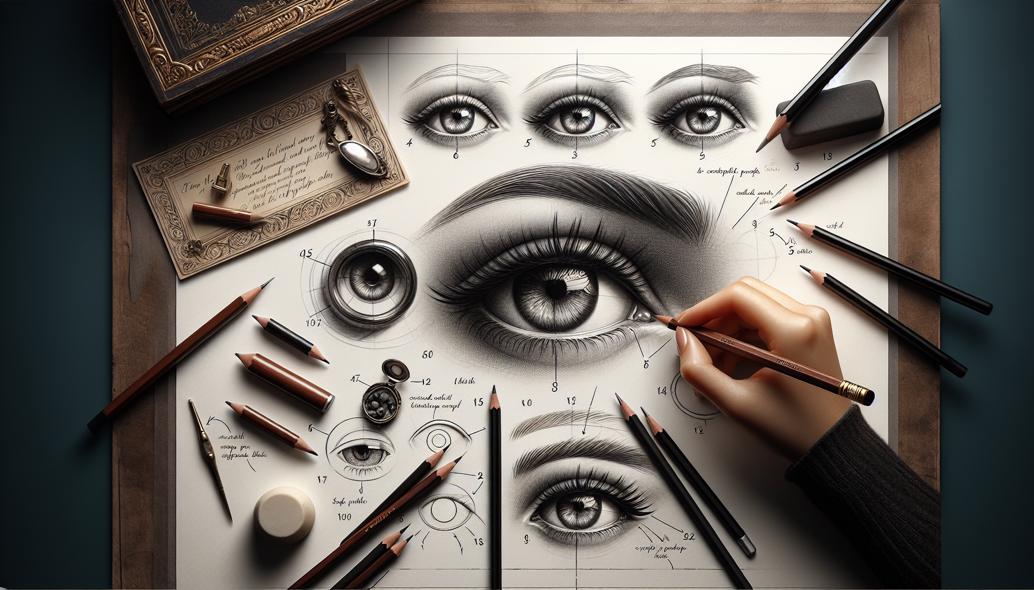
Step-by-Step Guide to Drawing Realistic Eyes
Unlock the secrets to drawing realistic eyes with our comprehensive step-by-step guide. From mastering basic shapes to adding lifelike details, this guide will boost your skills and confidence. Dive in to make your eye drawings truly mesmerizing!

Step-by-Step Guide to Drawing Realistic Eyes
Drawing realistic eyes can seem like a daunting task, especially for beginners. However, with the right techniques and a bit of patience, you can master the art of drawing eyes that look lifelike and expressive. This comprehensive step-by-step guide will demystify the process, helping you create stunningly realistic eyes.
Before we dive into the techniques, ensure you have the right materials: high-quality drawing paper, various grades of pencils (from HB to 8B), a kneaded eraser, a blending stump, and a ruler.
1. Start with the Basic Shapes
To begin, lightly sketch the overall shape of the eye. Start with an almond-shaped outline which will serve as the structure of the eye. Keep your lines very light because you'll need to erase and redefine them as you add more details.
2. Locate the Iris and Pupil
Inside the almond shape, draw a perfect circle for the iris, which should touch the top and bottom of the eyelid. Then, place a smaller circle in the center of the iris for the pupil.
3. Outline the Upper and Lower Eyelids
Sketch the upper and lower eyelids by drawing curves just above and below the main almond shape. Pay close attention to the relationship between the eyelids and the eyeball to ensure they look natural. The upper eyelid typically covers part of the top of the iris, while the lower eyelid sits just below the bottom of the iris.
4. Add the Tear Duct and Inner Corner
Draw the small, triangular tear duct at the inner corner of the eye. This part is often overlooked but adds a crucial element of realism. Make sure the tear duct seamlessly connects with both the upper and lower eyelids.
5. Define the Eyelids
Add more details to the eyelids by refining their shape. The upper eyelid usually has a small crease above it. Sketch this crease lightly, ensuring it's parallel to your primary eyelid line.
6. Shade the Pupil and Iris
Now, focus on the iris and pupil. Begin by darkening the pupil, which should be the darkest part of the eye. Next, add shading to the iris. Notice that the iris is not a flat, uniform color. It has intricate patterns and gradients, so use a variety of pencil strokes to replicate this texture. Typically, the area around the pupil is darkest, and the iris lightens as you move outward.
7. Add Highlights
To make the eyes appear glossy and three-dimensional, add highlights. These can be areas that reflect light, often located near the upper part of the iris. Leave these spots white or gently shade around them to maintain their brightness.
8. Detail the Eyelid and Eyelashes
With the basic structure in place, refine the details of the eyelid. Add subtle shading to suggest the three-dimensional form of the eyelid. When drawing eyelashes, remember they are not just straight lines. Use slightly curved, varying strokes to create a natural look. The eyelashes on the upper eyelid are generally longer and more numerous than those on the lower eyelid.
9. Work on the Skin Texture Around the Eye
Shading the skin around the eye is just as important as the eye itself. Lightly add some subtle shading to indicate the depth and contours of the brow bone and the area under the eye. Wrinkles, creases, and even faint veins can add a lot of realism.
10. Refine and Blend
At this stage, take your blending stump and gently blend the shadows and highlights. This helps to soften edges and create a smoother, more lifelike appearance. Be careful not to over-blend, as you want to maintain some texture.
11. Continuously Compare and Adjust
Step back from your drawing frequently to compare your work with your reference material. This practice helps you catch inconsistencies in shape, proportion, or shading. Adjust your drawing accordingly to improve the accuracy.
12. Final Touches
Add any final touches to capture the intricacies of a realistic eye. This can include subtle variations in tone, more defined highlights, or fine-tuning the eyelashes. The last step is to clean up any stray marks with a kneaded eraser, ensuring your drawing is polished.
Conclusion
Drawing realistic eyes requires a focus on detail, careful study of anatomy, and patience. By following this step-by-step guide, you can develop your skills and create eyes that truly feel alive. Keep practicing and experimenting with different techniques. Over time, you'll find your own style and methods that work best for you.
In summary, always start with basic shapes, gradually add details, pay attention to lights and shadows, and refine your drawing to reflect the complexity and beauty of the human eye. Happy drawing!