GridMyPic Logo
  1. Home
  2. /
  3. Blog
  4. /
  5. How to Draw Realistic Hair with Graphite Pencils
Samstag, 7. September 2024

How to Draw Realistic Hair with Graphite Pencils

Unlock the secrets to drawing realistic hair with graphite pencils! Master the flow, texture, and light to bring your portraits to life. Dive into expert techniques for stunning, lifelike hair that captivates and impresses every viewer.

How to Draw Realistic Hair with Graphite Pencils

How to Draw Realistic Hair with Graphite Pencils

Drawing realistic hair can be one of the most fulfilling, yet challenging, aspects of portrait drawing. Hair is dynamic and full of intricate details, making it difficult to capture with a single sweep of a pencil. Fortunately, with patience, technique, and the right tools, you can master the art of rendering lifelike hair using graphite pencils. This comprehensive guide aims to provide you with expert-level instructions to help you achieve convincing and realistic hair in your drawings.

Understanding Hair Structure and Behavior

Before you even pick up your graphite pencils, it's crucial to understand the structure and behavior of hair. Hair is not a solid mass but rather consists of individual strands that flow together, creating volume, texture, and depth. Here are some key points to keep in mind:

  • Direction: Hair grows in different directions depending on its location on the head. Observe the natural flow of the hair and how it changes direction.
  • Texture: Hair texture varies significantly between individuals - curly, wavy, straight, coarse, or fine. This texture needs to be considered to make your drawing realistic.
  • Light and Shadow: Light plays a significant role in portraying realistic hair. Pay attention to highlights and shadows, as they give hair its depth and realism.

Choosing the Right Graphite Pencils

Graphite pencils come in various grades of hardness, denoted by H (hard) and B (black, or soft). To draw realistic hair, you'll need a range of pencils:

  • 2H, H: For light initial outlines and fine details.
  • HB, 2B: For mid-tones and general shading.
  • 4B, 6B: For dark areas, shadows, and adding depth.

Using a combination of these pencils will allow you to build layers and create the subtle transitions necessary for realistic hair.

Basic Techniques for Drawing Hair

Here are some foundational techniques to guide you through the process of drawing realistic hair with graphite pencils:

Mapping Out the Hair

  1. Outline: Begin with a light outline using a hard pencil (2H or H). Sketch the hairline and general direction of the hair flow. Keep it light to avoid damaging the paper.
  2. Sections: Break down the hair into manageable sections. This helps you maintain control and focus on smaller areas one at a time.

Creating Volume and Depth

  1. Base Layer: Using an HB or 2B pencil, lay down a base layer by shading in the direction of hair growth. Keep your strokes light and build them gradually.
  2. Build Layers: Gradually add layers using darker pencils (4B, 6B) to create depth. Pay attention to areas where light hits and where shadows fall.

Detailing Individual Strands

  1. Fine Details: With a sharp H pencil, draw individual strands within the sections. Vary the pressure to create light and dark strands, giving the hair a more natural appearance.
  2. Blending: Use a blending stump or a soft tissue to gently blend the graphite. This helps to soften harsh lines and create smooth transitions.

Advanced Techniques for Lifelong Realism

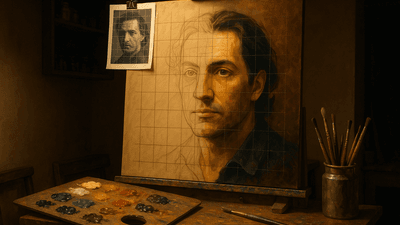
Drawing realistic hair with graphite pencils

Once you have a solid grasp of the basic techniques, you can start incorporating advanced methods to elevate your drawing:

Using Erasers as Drawing Tools

  1. Kneaded Eraser: This type of eraser can be molded into fine points and used to lift graphite from the paper, creating highlights and light strands of hair.
  2. Electric Eraser: Helpful for creating super fine highlights and detailed textural effects. Use sparingly to avoid overworking the paper.

Cross-Hatching and Texturing

  1. Cross-Hatching: Layering strokes perpendicular to each other can build texture and shadows in the hair.
  2. Scribbling Technique: Lightly scribbling can create the impression of frizz and flyaways, making the hair look more natural.

Addressing Common Mistakes

Drawing realistic hair requires attention to detail and careful observation. Here are some common mistakes to avoid:

  • Uniform Lines: Avoid drawing uniform parallel lines. Instead, vary your strokes to mimic the natural irregularity of hair.
  • Over-blending: Excessive blending can make the hair look flat. Maintain some defined strands to preserve texture.
  • Ignoring Light Source: Always be mindful of the light source in your drawing. Proper highlights and shadows add to the realism.

Final Touches and Continuous Improvement

Once you've completed the main drawing, step back and review your work. Use these final steps to perfect your drawing:

  1. Refining Edges: Clean up any stray marks and refine the edges of the hair to make them look sharp and defined.
  2. Contrast: Make sure there is enough contrast between the highlights and shadows. This adds to the three-dimensional appearance of the hair.
  3. Practice: Finally, like any other skill, drawing realistic hair improves with practice. Study different hair types and practice frequently to master this intricate art form.

Conclusion

Drawing realistic hair with graphite pencils can initially seem daunting, but by understanding hair structure, choosing the right tools, and practicing various techniques, you will significantly improve your skills. Remember to be patient and enjoy the process. Each strand you draw brings you one step closer to becoming a master of graphite hair rendering.

We hope this guide has provided you with the expert-level knowledge you need to create beautiful, realistic hair in your drawings. So, grab your graphite pencils and begin your artistic journey today!